Posted on

Sliding Stop on a Reining Horse

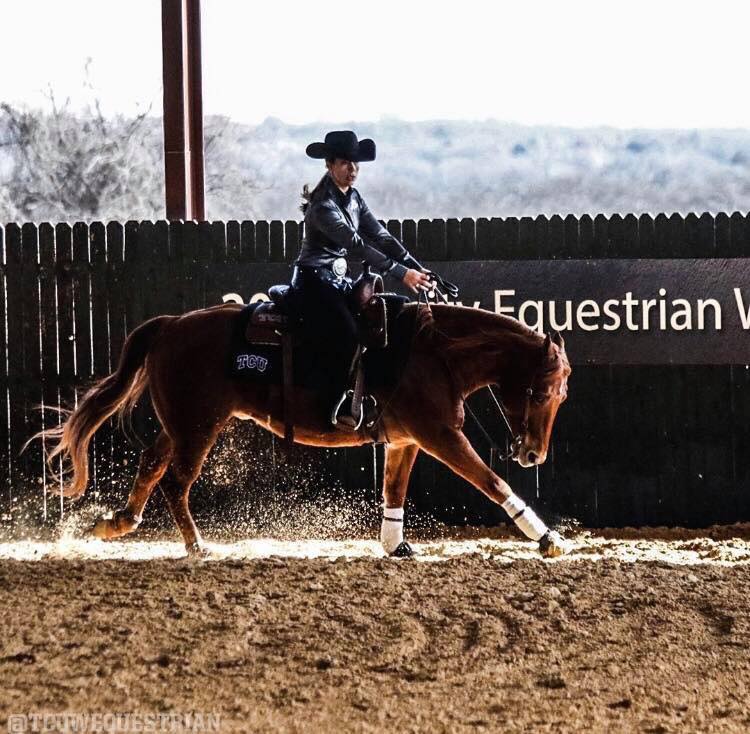
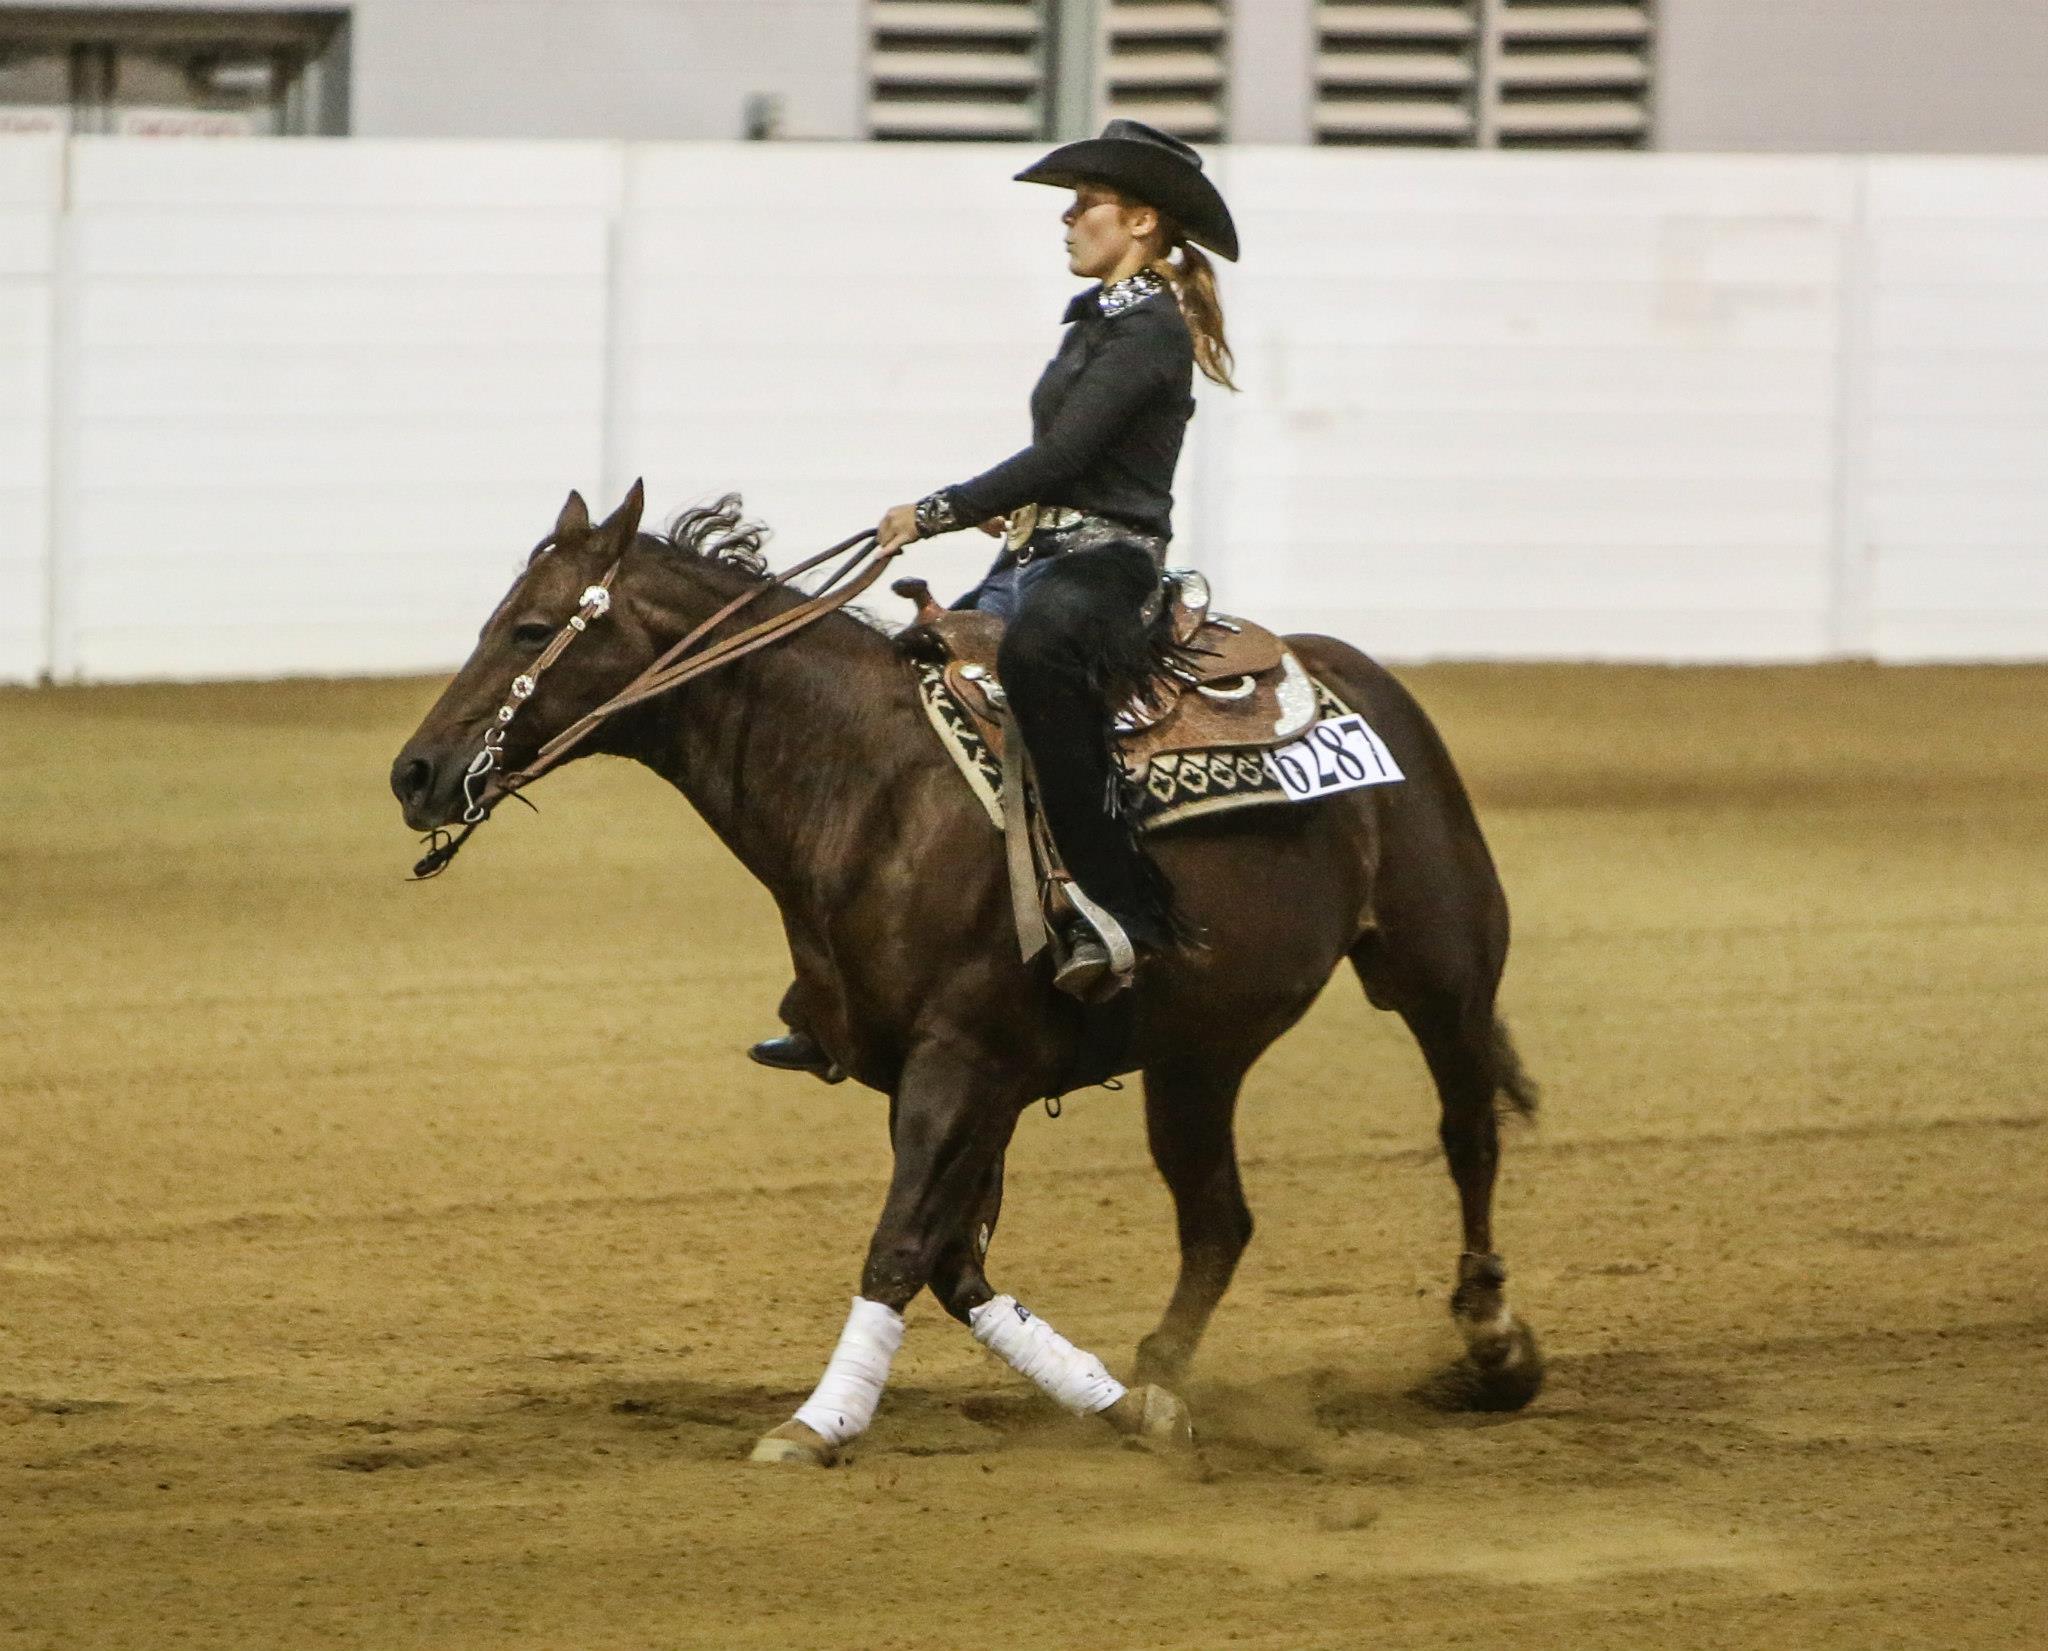
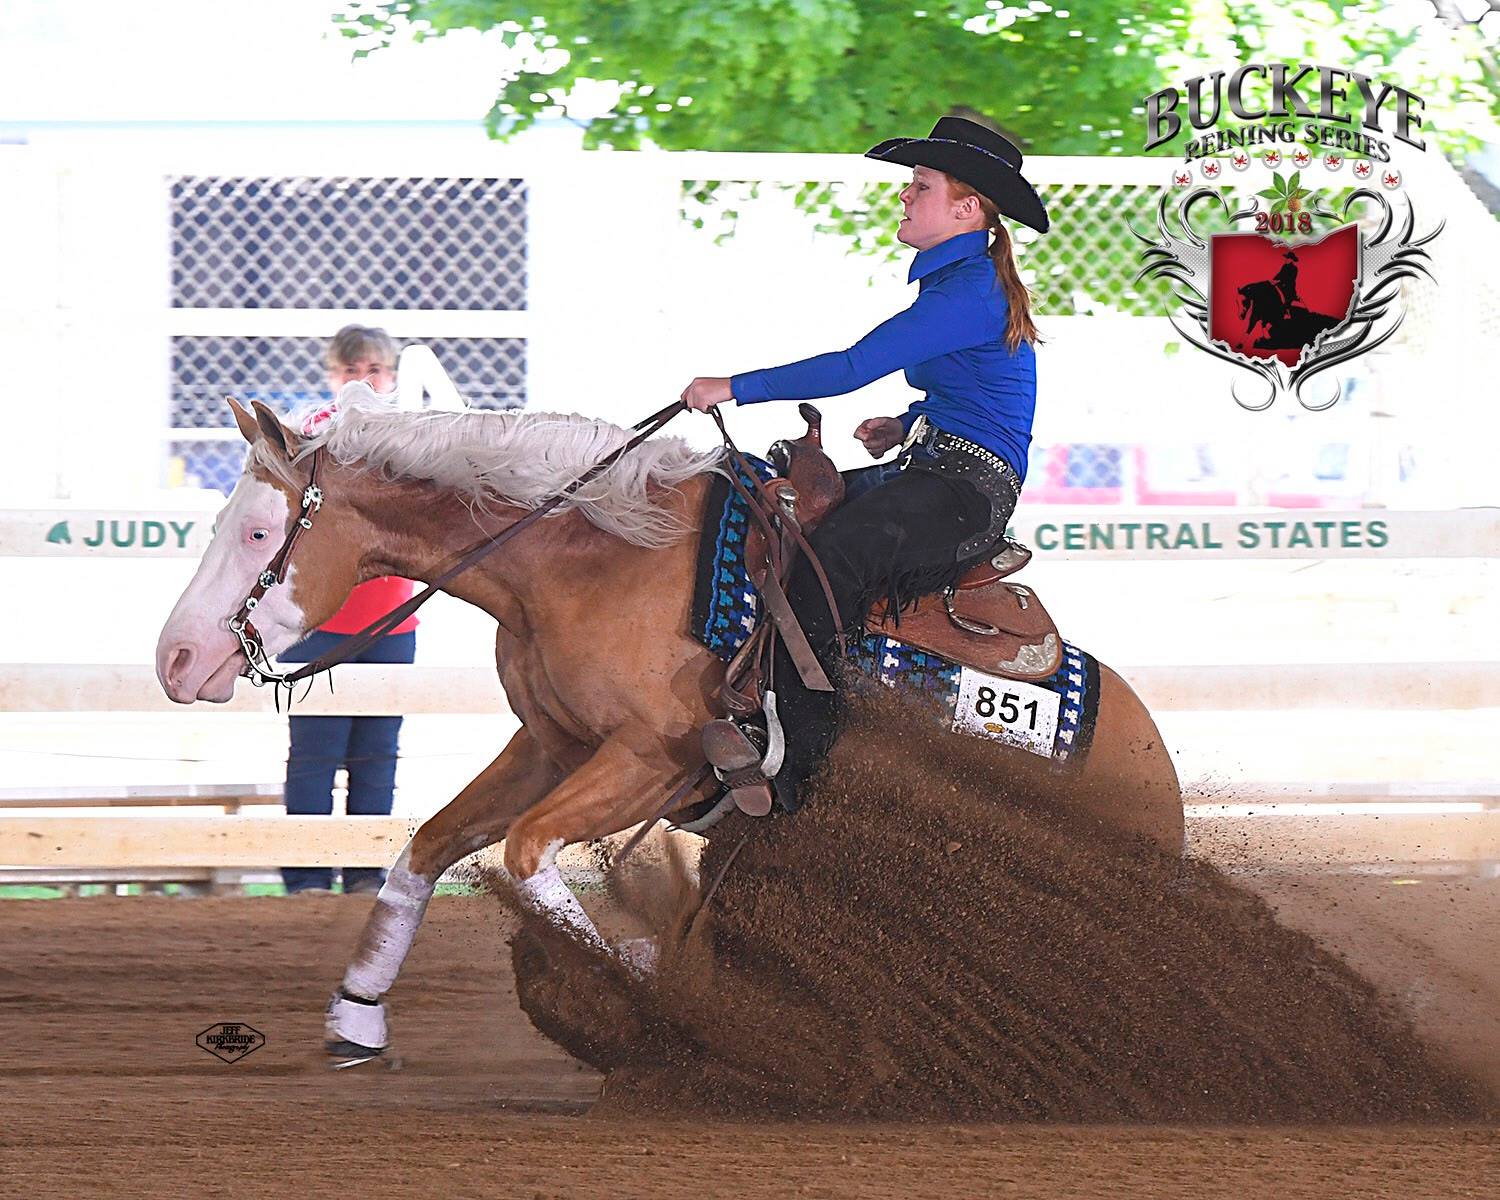
American Quarter Horse doing sliding stop

Sliding Stop on a Reining Horse

Brandy and Terri Murphy

Rundown

To have a good stop you must have a good run down. Start your lead departure by walking the horse forward with their head straight and in the bridle. After your first strides, you will be able to tell if the horse is soft and collected or if you need to work to get them that way. When you are working the rundown, forget the stop. Use the length of the arena, even if they break down, trot them up into the bridle to the end of the arena. Once the horse is straight you can start to ask for an increase in speed during the rundown. Only after the horse is going straight and you can rate their increase in speed should you say whoa and ask for the stop. Doing this teaches the horse to hunt the stop with their head down and their body round, as well as travel straight and wait for your cue to increase in speed.

https://www.youtube.com/watch?v=Bkfi0_67Q7E

Stopping Exercise

Using two hands start out on the left lead across the pen on the diagonal. As you go, build speed while maintaining collection. Once you get to the half way point break down into a trot. Continue to the corner and counter bend a circle in the direction of the right lead at the trot. Now lope off in the right lead and do another diagonal breaking down to the trot to the corner and counter bend a circle in the direction of the left lead at the trot. As you are building down the diagonal you want to pick up your reins and hold them to maintain collection. Doing this helps teach the horse to pick up their back and stay collected as you drive to the stop. https://www.youtube.com/watch?v=HUChKea5TFA

Jay Dee Anderson

Run Down and Stop

Jay Dee likes to work on the run down and stop by doing a rectangle around the arena. The first step is to lope around the arena and make a small to medium size circle at the end of the arena. After doing that a few times he starts to build speed for the rundown and maintains that speed into the circle at the end of the arena. Once he has done this and the horse is straight and building well he will ask for the stop by saying whoa. The goal of the is exercise to prevent the horse from anticipating the stop and slowing down before you tell them to whoa. A good stop requires an increase in speed on a straight line with the last stride being your fastest.

Mack Weaver

Run Down and Stop

This exercise for the run down and stop helps keep the horse from running off after you turn the corner at the top of the pen. It also allows you to practice the maneuver without having to lope as much.  Start by walking half way across the top of the pen and loping off. Once you turn the corner for the run down you want to see if the horse is waiting on you to go to the stop. If not turn the horse into a small circle and stay there until you feel the horse is listening to you. Once the horse is, go to the top of the pen and walk across half way and lope off and try it again. If the horse is waiting on you for the run down go ahead and continue down the pen and stop. Wait at the end of the pen for a minute or so and walk across the pen half way and lope of and repeat the exercise. https://youtu.be/V6iMIxrpyq4

Rein length is very important when it comes to getting a good stop. If your reins are too short the horse will not be able to drop their head and move as well in the stop. Short reins can cause you to pull on the horse’s face causing a jarring of bit in their mouth as well as stopping their forward motion. Mack likes to have a shorter rein around the top of the pen, but when he turns the corner for the run down he will shake out some rein so that the horse is on loose rein for the run down and stop.

Sean Johnson

The Run Down and Stop.

When you are running down to the stop you want to have your inside leg forward and your outside leg is used to bump for more speed if the horse does not respond to the kiss.  You also want to be driving down into your heels and sit down and back in the saddle. The idea is to have your body already in the stop position and be behind the motion. Being in the stop position as you are running down allows your horse to go to the ground with their hind end and you to stay seated during the stop. When you are stopping a horse you also want to be aware of your reins. You can use them to moderate the speed if you need to but when you ask for the stop you really don’t want to pull back on the reins. Pulling back on the reins will stop the forward movement and result in a shorter stop that can be heavy on the front end.

As with everything in reining maneuver the approach to the stop is just as important as the stop itself. What we did was use the entire length of the arena as well as going around the ends. The advantage to this is you can practice speed control at the ends as well as squaring off your corners in preparation of the run down. Sean likes to practice the stop this way because it allows you to build for the stop but you are not always stopping every time. He feels that when you are sitting in stop position and squared your corner and building incrementally you are able to surprise the horse with the stop there by training the horse to stop only when asked.

I hope you have enjoyed this post and will share it with your friends.

All images were provided by Maria Hurd and show case her daughters Amanda and Elena Hurd competing.

For more reining horse training blogs go to the post page at https://horsetaillegacy.com/jgjs

Posted on

Lead Change Maneuver on a Reining Horse

American Quarter Horse and rider

Lead Change Maneuver on a Reining Horse

The lead change maneuver on a reining horse has always been one of the things that I didn’t practice a great deal so it made me nervous to do them. Working with these professional reining horse trainers help me look at the lead change differently. I was able to incorporate their techniques into my practice routine, which made doing lead changes just another maneuver instead of something I was uncomfortable practicing and doing. The bottom line is that we practice every other maneuver until we can do it in our sleep and the lead change shouldn’t be any different. Changing leads is a nature thing for a horse to do, all we are asking is for them to do it on cue.

Ashley Villmow

Lead Change

For this exercise, I made a figure eight shape around the arena. Starting on the correct lead I loped around one end and then turned to cut across the center of the arena on a diagonal into the other circle on the counter canter at the opposite end of the arena. I would then continue around and across the center maintaining the counter canter. Once at the opposite side of the arena I would be back on the correct lead. As I turned to cross the arena again I would ask for the lead change on the straight line just before or after I passed center. Once the lead change was done I continued around the circle and stopped as I started the next diagonal line across center. This exercise allows you to work on lead changes without the horse starting to anticipate the change. https://www.youtube.com/watch?v=btt6swO5Xec

Bobby Avila

Lead Changes in the Center

All reining patterns require a lead change in the center. We all need to practice changing leads in the center especially before a show. So how do you do this and prevent the horse from anticipating the lead change in the center. What Bobby does is practice the lead changes in the center of the circle until he is happy with the maneuver. Than he finishes the practice with circles and no lead changes, there by taking the lead change out of the circle at the end so the horse is not thinking circle always means change leads in the center.

Brandy Murphy

Lead Changes

When doing a lead change, you want the cues to be very simple. This exercise is done in a counter canter circle. As you circle you want the keep your outside leg off the horse and your inside leg is used to push the horse’s hip over and maintain the counter canter. Continue to lope around like this until the horse is following the circle well. When you are ready to change leads simply close your outside leg on the horse and open your inside leg to ask for the lead change. Doing the lead change this way sends a clear message to change leads when your legs change position. https://www.youtube.com/watch?v=_aOyNxd-ots

Bruce Barber

Lead change

Counter cantering a circle is a great exercise to work on the lead change. Normally a horse wants to be in the correct lead on the circle so it becomes a natural movement for them to change to the correct lead when asked. It is important to stay in rhythm with the horse and to ask for the lead change by softening the horse’s chin and changing your weight into your outside hip and step through the change by placing your outside leg on and releasing the inside leg and clucking. This allows the horse to change into the correct lead for that circle while allowing you to practice the lead change.

Dallas Cunningham

Lead Changes

For the lead change Dallas prefers to keep it as simple as possible. He feels that the horse should be able to change leads whenever they are asked. In keeping with that philosophy, he does not do much in the way of setting the horse up. He leaves his hand down and asks for the lead change by changing legs.  To practice this, we loped a counter canter circle and maintain light leg pressure to maintain the counter canter. Once the horse was moving well we simply changed legs to get the horse to change to the correct lead. Dallas feels this method helps take the anticipation out of the lead change because the horse never knows when it is coming. https://www.youtube.com/watch?v=IfAEdOtqTHY

Jay Dee Anderson

Lead Changes

For a horse to do a lead change easily they need to be straight, collected and moving forward. This simple counter canter exercise helps you achieve all three. Jay Dee likes to counter canter a square at one end of the arena. Doing a square gives you four straight lines to use to change leads. The corners also allow you to practice squaring off your straight lines which you need to do to get a good rundown for the stop. Once he has done a number of squares he will ask the horse to lead change. Because you are riding in a square it also helps teach the horse to change leads and stay straight.https://youtu.be/2ZTneQSUrOc

Linda Hitt

Lead Changes

The lead change exercise was a new one for me. We counter cantered around the outside of the arena being sure to stay away from the walls. After multiple times around the arena I would ask for the lead change by laying my outside leg on and releasing my inside leg and kissing for the lead change. This was done on the long straight line of the arena. I have to say I was not good at this exercise. Every time I took my inside leg off my horse thought I wanted him to stop.

Mack Weaver

Lead Changes

Mack believes that you have to practice lead changes to be able to feel comfortable doing them. The way he does this is by making the center line anywhere down the length of the arena that crosses the middle of the pen. Making the center a different place allows you to work on the lead change in such a way that the horse will not anticipate the lead change. He likes to set the horse up as he comes through center by picking up on the reins and getting the horse straight through center. Doing this on the correct lead and the counter canter over and over until the horse is relaxed with coming through center and has their body straight. Once they are relaxed he will ask for the lead change but he will continue in the same circle on the counter canter. Staying in the same circle helps prevent the horse from dropping into the opposite circle after the lead change. https://www.youtube.com/watch?v=zEua8RgiToU

Mike Davis

Lead Change

Before loping off pick up on the reins to let the horse know that they are about to do something. Than lope a few circles picking up on the horse through center to get them to straighten up. Once the horse is picking up well than move on to the main exercise. The exercise is started by loping a straight line down the length of the arena. At the top make a counter canter circle and cross the arena picking up as you cross the middle. Continue around on the counter canter to the top of the arena and turn to go on a straight line to the opposite end of the arena. Repeat this pattern a few times picking up on the horse when on the straight lines down the center and across the middle of the arena. Once the horse is picking up and moving smoothly change legs and ask for the lead change. This exercise works well because the horse does not anticipate the lead change and all the time spent picking them up allow them to change leads smoothly. https://www.youtube.com/watch?v=rKWK7YOA_E4

Nathan Kent

Lead Changes

This exercise is done by making your circle into an oval shape. You want to lope off and start making your oval. As you come through the center of the arena on both of the long sides of the oval you want to pick up your reins and keep your outside leg on. This is how you set the horse for the lead change. You don’t want to do the lead change until the horse is relaxed and straight as you set up for the lead change. Once you have the horse soft and straight, go ahead and change leads. Once you change leads you want to remain in a counter canter circle. Doing the counter canter circle helps keeps the horse picked up and prevents the horse from dropping into the other circle. You can counter canter a few circles and then move into the circle onto the correct lead and repeat the exercise. This exercise helps teach the horse to relax through the center and not anticipate the lead change. It also allows the rider to practice the lead change in the center without the horse getting sour in the middle. Click this link to watch the video explaining the lead change exercise. https://www.youtube.com/watch?v=v_56fsgvjMk

Steve and Dori Schwartzenberger

Lead Changes

We started the lead change exercise by counter cantering the circle. The advantage to the counter canter is that it helps the horse to frame up and stay in shape themselves. Once in the counter canter circle you want to have the horse’s head and body following the circle as if they are in the correct lead. By doing this it helps keep the horse’s shoulder picked up before you ask for the lead change. Having the horse following the circle as if they are the correct lead keeps the lead change simple for the horse. Their body is already following the circle so all they have to do is change their feet and they are in the correct lead.

I hope you have enjoyed this post and will share it with your friends.

All images were provided by Maria Hurd and show case her daughter Elena Hurd competing.

For more reining horse training blogs go to the post page at https://horsetaillegacy.com/jgjs

Posted on

Turnaround Maneuver on a Reining Horse

American Quarter Horse and women

Turnaround Maneuver on a Reining Horse

Bobby Avila

Turnaround

My horse likes to hang his right shoulder out in the left turn around. I have used many different exercises to improve his reach in the left turn around, but have found that he improves for a while but then he goes back to hanging his shoulder out again. Bobby’s approach was to allow the horse to correct himself. The way we did this was by placing my right leg forward so when he hangs his shoulder out he would hit my spur. The advantage of this is the horse learns to reach with his shoulder because he wants to avoid hitting the spur not because you are spurring him. Again, teaching the horse what is right and giving him the ability to make the right decision

Brandy and Terri Murphy

Turnaround

There are two exercises that we worked on for the turnaround. For the first exercise, you start by walking the horse in a small circle. While you are doing that you lay the outside rein on the horse’s neck and bump the inside rein out and slightly back to get the horse to point their nose to the inside. This helps get the horse back on the inside rear foot as well. Once the horse is responding to the outside neck rein you can ask for the turnaround. When you are working the turnaround, you want to walk or trot out of the maneuver to make the horse work harder outside the turnaround. This helps get the horse to hunt the turnaround since it is less work.

The second exercise is designed to keep the horse in the correct frame during the turnaround. With one hand on the reins start trotting a circle. Than take your free hand and close it over the reins at the level of the horse’s neck. Using both legs bump the horse’s belly to get them collected up and straight. Once the horse is collected ask for the turnaround by bumping only with your outside leg. Be sure to maintain the same hand position so the horse remains in the collected frame. This helps teach the horse not to throw their head up or turn their nose out when they are asked for the turnaround. https://www.youtube.com/watch?v=eUmwszMd5EU

Dallas Cunningham

Turnaround

This turnaround exercise helps develop a snappier turn by teaching the horse to move their inside front leg back and their outside front leg to push off and cross over. Start the exercise by trotting a small circle with your inside rein up and slightly forward and your outside rein on the horses’ neck. If the horse is leaning to the outside with their shoulder, you want to bump your outside leg to get their shoulder to commit and then ask for the turnaround. Once they are turning well, trot out to a small circle again and repeat the exercise until the horse will commit to the turn as soon as you lay the outside rein on their neck. https://www.youtube.com/watch?v=x7GQlJD1Kek

Jay Dee Anderson

Turnaround

Before you ask the horse to turnaround you need to work on collection. Jay Dee does this by walking a small circle. He pushes the horse’s hip into the circle with his outside leg. With two hands, he picks the reins up in a “V” shape and bends the horse’s neck to the inside of the circle. He uses his inside leg to prevent the horse from dropping into the circle or turning. This exercise helps pick the horse’s front end up and teaches them to turn without sticking their nose out. The more collected the horse is in the turnaround the easier it is for them to cross their legs over and turn smoothly.

Starting the turnaround. Jay Dee trains his horses to turnaround as soon as he lays the outside rein on their neck and kiss. He does this so that when anyone gets on the horse they don’t need to think about the turnaround, they just need to lay the outside neck rein and kiss and the horse will turn. In addition, he feels using your outside leg to start the turnaround often causes the horse to look in that direction instead of keeping their head looking in the direction of the turnaround. He keeps his outside leg next to the horse’s body but does not squeeze with it. If he needs more speed he will bump with the outside leg and kiss. To stop the turnaround, he says whoa and puts his hand down. He does not like to stop every turnaround, but likes to walk out into a small circle, this help keeps the horse from anticipating the shut off of the turnaround and work on collection. https://youtu.be/qtFdCeZz_6g

American Quarter Horse and man

Mack Weaver

Turnaround

On an older horse, Mack works a lot on their start. He wants the horse to move off the neck rein as soon as he lays it on their neck. If they don’t move than he will pull them around and stop and ask again until they start to respond to the neck rein as soon as they are asked. https://www.youtube.com/watch?v=XIiWVo-81lA

Mike Davis

Turnaround

Irish tends to tip his nose to the outside during his turnaround which makes it harder for him to cross over in the front. Mike feels that the reason he does that is because he is trying to move off the pressure from the outside leg and the more pressure the more he tips his nose out. To fix this he works on lifting the horses front end up as they are trotting around in a small circle by picking up with the reins. At first you will need to exert a good deal of pressure to get the horse to lift their front end but as you lift and release over time the amount of pressure needed will decrease until the horse is lifted enough in the front end to be able to cross over smoothly.

https://www.youtube.com/watch?v=SCm4ens9B1M

https://www.youtube.com/watch?v=bDAk5fZ72JQ     https://www.youtube.com/watch?v=wshSMpp7exc

Nathan Kent

Turnaround

Nathan likes to trot a small circle in a counter bend to work on the turnaround. To do this you pick up your outside rein and bring it across and above the saddle horn. This bends the horse’s neck to the outside of the circle. The inside rein is back and just above your hip to help balance the horse’s face. Using your outside leg, push the horse’s hip to the inside of the circle. Doing this gets the horse’s front and back legs to cross over. After the horse has crossed over a few times release their head and let them turn in the direction they were crossing over to. So, if the horse was crossing to the right you want to turn right. This exercise helps get the horse to drive from behind for the turnaround. You don’t want the horse to only pull from the front on the turnaround. When you ask for the turnaround this exercise has conditioned the horse to use their whole body to execute the maneuver. Click this link to watch the video explaining the turnaround exercise. https://youtu.be/buFxHccptQ0

Patti Cusker

The Turnaround

Patti’s approach to the turnaround it to ue the horse by turning your head in the direction she wants to turn, as well as opening her inside leg and putting pressure on the horse with her outside leg. She uses very light contact with the outside rein to start the turn and prefers to say whoa to stop the turn. The goal for teaching the horse to turn using more body and leg pressure is to be able to turnaround without pulling on the horse’s mouth. The overall result is a responsive horse with a very soft face.

For my turnaround, we worked on keeping my horse head position correct. He likes to turn his nose to the outside of the turn. When he does this, it hinders his ability to cross his front legs over in a smooth cadence. In keeping with Patti’s soft hand approach to training I would use my free hand to lightly pick up the inside rein and drop it to get his nose to straighten up. This is a soft movement just like tapping someone on the arm to get their attention. The end result was a smooth turnaround with more natural speed.

Sean Johnson

Turnaround

The turnaround requires the horse to cross their front outside leg over in front of the inside leg.  The outside shoulder cannot be pushing to the outside or the horse will not cross over well. To work on this start trotting your horse in a small circle and guide their nose by pulling your inside rein out and holding it there. Continue to trot like this until you feel your horse’s shoulder and neck commit to the circle. Once they commit to the circle open your inside leg and lay your outside rein and turnaround. While turning pull your inside rein out and kiss and release. The horse should increase in speed every time you kiss. If the horse does not increase its speed bump them in the outside shoulder and pull your inside rein out and kiss all at the same time. Do this for multiple revolutions and then trot out into the small circle and repeat the exercise. After doing this exercise in both directions and you feel the horse is crossing over well and is committed to the turnaround you can go ahead and do the turnaround maneuver in both directions.

Sean likes to start the turnaround by opening the inside leg and rein and laying the outside rein on the neck and outside leg on the body. He does not like to kiss to start the turnaround because he feels it can create a more abrupt start. Once the horse has taken three steps he kisses once for more speed and then again for each increase in speed. If the horse does not increase in speed he will bump the horse with the outside leg or both legs as well as kissing. If they speed up with every kiss, reward the effort by stopping the turnaround and let them rest. If you would like to see my video recording of Sean explaining turnaround exercise check out my you tube link. https://youtu.be/ouDRj7xYR3g

Steve and Dori Schwartzenberger

Turnaround

For this exercise, we trotted a small circle with the horse’s front end squared up. Once the horse is collected up and lock into the circle ask for one or two turns and trot out into the small circle again. Continue to do this exercise and ask for more turns each time. Soon the horse will be hunting the turn around and crossing over correctly in the front and planting the pivot foot behind.

The interesting thing about the turnaround that I learned was that the inside front leg needs to step laterally to allow the outside front leg to cross over. To help teach the horse to step laterally with their inside leg you want to bring your inside rein over your inside knee and lay the outside rein on the horse’s neck. This will cause the horse’s inside leg to follow the inside rein. The result will be a clean cross over with the outside front leg.

I hope you have enjoyed this post and will share it with your friends.

Feature image was provided by Maria Hurd and show cases her daughter Amanda  Hurd competing.

For more reining horse training blogs go to the post page at https://horsetaillegacy.com/jgjs

Posted on

Reining Horse Circle Maneuvers

American Quarter Horse Loping

Circle Maneuver On a Reining Horse

Circling a horse sounds easy enough, but it takes training and practice to achieve the perfect circle. The information here outlines how professional reining horse trainers teach their horses to circle.

National Reining Horse Association Handbook definition of circles

“Circles are maneuvers at the lope, of designated size and speed, which demonstrate control, willingness to guide, and degree of difficulty in speed and speed changes. Circles must at all times be run in the geographical area of the arena specified in the pattern description and must have a common center point. There must be a clearly defined difference in the speed and size of a small, slow circle, and a large, fast circle; also, the speed and size of small, slow right circles should be similar to the small, slow left circles; and the speed and size of the large, fast right circles should be similar to the large, fast left circles”

Bobby Avila

American Quarter Horse LopingOur horses are trained to be responsive to our body ques. When you ride a circle, you want to ride spotting 1/8 of the circle at a time. If you ride too far ahead of your horse it becomes difficult to maintain a consistent circle. An older horse knows how to stay under your hands and follow the circle however, if they make the back decision to lean in or out of the circle Bobby likes to correct this by turning the horse sharply across the circle and then get back on the circles’ path. These two techniques helped my circles a great deal. It also helps reduce the need to continually pick up my hands to guild him to do what he already knows my horse throughout my circle. The more we did this the better he stayed between my hands and on the path of the circle.

Fast Circle to Slow Circle Transitions

The transition from a fast circle to a slow circle requires rhythm. The approach was to ask the horse to increase his speed until he and I were in a comfortable rhythm and to maintain that. Once I had the rhythm, it became a matter of transitioning down by putting wait into my feet and sinking down into my saddle and maintaining the rhythm to create a smooth transition to a slow circle. The end result was a much smoother looking transition in which I was in rhythm with my horse at each speed.

Brandy Murphy

Fast to Slow Circles

American Quarter Horse LopingWhen transitioning from fast to slow circles you need to build in the cues that signal the horse to make the change in speed. Start by loping a circle and when you want to slow down start to hum, pick up your hand as they start to come back to you drop your hand. Use your outside leg to push the hip into the circle. Then once they come back, you want to stop them. This conditions the horse that when they hear the hum they think stop. Once they understand the cues, then move on to the transitioning from fast to slow circles. Be consistent and your horse will learn how to transition smoothly.

https://www.youtube.com/watch?v=CNNLjj1js88

Bruce Barber

As you circle you will feel when the horse is leaning as soon as you feel it stop the horse, back them up and rollback and depart. Timing the work to happen as soon as the lean occurs is important so the horse connects the work with the leaning.

This exercise helps the horse learn how to stay on the circle willingly. The exercise can be done at the trot and the lope. The goal is to make the horse work when they lean. Once they understand that it is less work to stay on the circle you have taught them to be more willingly guided.

Jay Dee Anderson

Lead Departure and Building Speed in the Circle

For the lead departure Jay Dee picks up the reins and applies light pressure to the bit and asks the horse to lope off. After a few strides, he breaks the horse down to a walk and repeats the process. This teaches the horse to allow you to pick up on the reins and to keep their head down in the lead departure. The next step is pick up on the reins and increase the speed by kissing and bumping with your legs. This technique allows you to pick on the horse in the show pen to increase speed while remaining collected. Once he has the speed he wants he puts his hand down and bumps with his legs and kisses to speed the horse up if they start to slow down. https://youtu.be/yK2rGjiH84M

Linda Hitt

Transitioning from a large fast to a small slow first

Linda likes to think of the circle having spotting points in the shape of STOP sign. Thinking this way gives you the visual of the center of the circle being a straight line. Linda placed two traffic cones on each side of the center line. This created an alley way to guide through as you go from your large fast circle to your small slow. This added visual really helped me to stay straight through center and to time my transition to the small slow.

Mack Weaver

How to keep your horse on the circle when riding one handed. Start by keeping your hand in line with the center of the horse’s mane and keep your shoulders square. Look in the direction you want your horse to go. Your horse should stay on the path you are looking toward. If the horse leaves the circle to the outside you want to stop the horse and turn the horse around to the inside of the circle. Lope off, then cut the circle in half so that you get back to the spot the horse left the circle faster. Frequent repetition allows you to correct the horse in the trouble spot. https://www.youtube.com/watch?v=7UGWl3dW5TY

Nathan Kent

Nathan likes to warm up for circles by trotting in a small circle.  From a small circle, you ask the horse to follow the path you chose for that circle. If the horse leaves that path, lay the outside rein, and move them back on the path of the circle. This is also done at the lope. Doing this exercise gets the horse sensitive to the neck rein, which teaches them to guide with very little pressure.

If a horse does not want to stay on the circle the other exercise you can do is to stop the horse and turn them around a few times and lope off. You want to turn them into the circle to teach them to follow it. You want to keep doing this exercise until the horse is soft in the face and following the circle with very stride.

Large Fast Circle

When running a large fast circle your hand position needs to be close to the horse’s neck and forward.  To guide the horse in the circle from that position Nathan likes to have his hand lined up with the horse’s inside ear. This position allows you to direct the horse without lifting up or pulling back on the reins. It also gives the horse a clear direction to follow because your reins are contacting a sensitive part of their neck.

Sean Johnson

Sean explains that it takes another half circle before the error becomes evident. So, if your horse is not coming through center on a straight line, the error occurred half way back on the circle, not at the center. Thinking this way was a great insight into where the mistake really started and that the correction should be made back when the mistake was created and that would prevent the mistake that became evident halfway around the other side of the circle.

The goal of the reining circle is to have the horse willingly guided and if you are helping them all the time they are not willingly guided. You want the horse to do more work than you. If you want to teach the horse to lock into the circle, only correct them when they make the mistake. If they leave the circle guide their nose to the inside with your inside rein at the same time bump with your outside leg. Once they are following the circle bring your hands back to center and let the horse follow the circle. If the horse is dropping into the circle guide them to move out by opening your outside rein and bumping with your inside leg. After working on this my horse started to move more freely and was locking into the circle on his own.

Circling can become monotonous for both you and your horse. You really want them to be waiting for what comes next. A great way to do that is to add a stop and a turnaround to the outside and loping off in the opposite direction. This one exercise helps sharpen up the circles, the turnaround, the roll back, the stop, and the lead departure.

Steve  Schwartzenberger

What to do if your horse is looking out of the circle.

If a horse is looking out of the circle you want to use your inside rein and bend the horse at the pole by bring your inside rein back and up to your hip. Keep your forward motion as you ask for this bend and continue to ride half way around the circle and release the rein so the horse is following the arch of the circle. Continue to do this until the horse understand that they are to follow the circle without looking out.

I hope you have enjoyed this post and will share it with your friends.

All images were provided by Maria Hurd and show case her daughters Amanda and Elena Hurd competing.

For more reining horse training blogs go to the post page at https://horsetaillegacy.com/jgjs

Posted on

How to Ride Your Reining Horse Better with Sean Johnson Professional Reining Horse Trainer, Glenpool, OK

American Quarter Horse, Reining Horse, Cluck Cluck Lena

Sean Johnson Professional Reining Horse Trainer, Glenpool, OKAmerican Quarter Horse, Reining Horse, Cluck Cluck Lena

This post will concentrate on exercises for rollbacks, turnarounds and the counter canter on a finished reining horse.

This was my second trip to ride with Sean Johnson. After losing my trainer at home, I contacted Sean to see if it would be possible to come back to Oklahoma to ride with him a few times a year. Sean put me on a nice gelding named Cluck Cluck Lena. He is so much like my horse Irish I was able to concentrate on improving my riding without having to deal with the big learning curve that comes with riding a different horse. While I was there we worked on all the reining maneuvers. I have outlined some of the main exercise we focused on below.

Rollback Exercise

I like to call this exercise the mental gymnastics exercise. This exercise is designed to help load the outside hock in preparation for the rollback and lead departure in the opposite direction. To do this exercise for the left rollback, start backing in a circle to the right.  Pick up your left hand and keep right hand slightly lower. The hand position is the same as when asking for the rollback. Your left leg should be on the cinch and your right leg is behind. As you are backing up look slightly over to the left. Once the horse starts to soften in the backing up, start to lower your hand and keep backing up. Than ask for the rollback by bringing your hand to your left shoulder and turning your head and shoulders in the direction you want to lope off. To do a right rollback reverse the backup direction and the hand and leg position. The way I think of the leg position is to place them where they would be if I was doing a simple rollback but adding in backing circle as a windup before the release. These videos will demonstrate how to do the exercise.https://youtu.be/nxqXJcQKkXU

A few other thoughts about the rollback.

In practice it is good to ask for the lope off a step or two past your line. This helps teach your horse not to anticipate loping off down the line since they are not conditioned to only rolling back a set spot every time.

Think of the rollback as a quick movement, that needs the rider to move slowly to achieve a smooth maneuver.

Turnaround Exercise

The purpose of this exercise is to get the rear inside pivot foot to drive deeper under the horses’ body. Start by trotting a circle. Pick your outside hand up and place it on the horses’ neck and keep your inside hand down and out. Using your inside leg, push the inside hip toward the outside of the circle. Keep your outside leg up near the cinch.  Once you feel the horse is crossing over/under well, then stop and ask them to turn in the direction you were trotting. If you were trotting right then turn right. The tendency is for the horse to start moving their front end faster. To block this from happening you can pick your outside hand up and tip the horses’ face to the outside of the circle.  Check out these videos to see how the exercise is done. https://youtu.be/05BWL50GT9M      https://youtu.be/05BWL50GT9M

Counter Canter Exercise

This exercise helps you use your legs and seat to feel when your horse starts to push or lean on you. Start by looping in the counter canter around the length of the arena. As you go down the long side of the arena start to lengthen the horse’s stride. About 3 – 4 strides before the corner slow down, then make a 90 degree turn and stay parallel to the short side of the square and make another 90 degrees turn, once you are pointing straight, drive down the long side. During these turns the horse will have a tendency to drop to the inside. You will need to use your inside leg to keep the horse stood up. This exercise also helps develop your ability to rate the horses’ speed. This will also help you use your body position to maintain a straight line, which is needed when doing a sliding stop. This video explains the exercise.

https://youtu.be/L7HfNaL0Ftw

I was fortunate to be able to spend eight days riding with Sean. The ability to repeat the exercise multiple days in a row makes it easier to learn the feel of the horse’s movement. Now that I have the feel, I can take the information home and practice on my own horse.

After working at home for a few days Irish and I really started to click with these exercises. I am looking forward to some even snappier rollbacks and smoother turnarounds.

While riding with Sean Johnson I logged 20 hours toward the AQHA Horseback Riding Program. I also earned my 2000 hours reward gift. A Professional Choice Saddle Pad Case. Go to the AQHA website to find out more about the Horseback Riding Program and AQHA. https://www.aqha.com/trail-riding/programs/aqha-horseback-riding-program

For more information about Sean Johnson Professional Reining Horse Trainer go to: http://johnsonreining.com/

I hope you have enjoyed this post and will share it with your friends.

For more reining horse training blogs go to the post page at https://horsetaillegacy.com/jgjs

Posted on 2 Comments

How to Ride your Reining Horse Better with Nathan Kent Professional Reining Horse trainer Kuna, ID

Nathan Kent Professional Reining Horse Trainer, Kuna, ID

Irish in Kuna, Idaho

Kuna, ID is as far west as this great adventure is taking us. We rode with professional reining horse trainer Nathan Kent. We worked on our roll back, large fast circles, lead changes, turnarounds and what to do if your horse spooks at things outside the arena.  Nathan’s overall approach to horse training is to find what works for each horse. Even if the horse is not going to be a reining horse he will train the horse so that it could be ridden in another discipline like cutting, ranch riding or trail riding. He feels that this approach is what keeps horse training interesting and challenging.

While we were in the area we were able to go to the Great Western Reining Horse Association reining horse show in Nampa, ID. The fun thing for us was we got to see three of the trainers we visited Mack Weaver, Nathan Kent and Jay Dee Anderson all at the same show. Watching the pros that you worked with show is always a great experience. It inspires you to work toward whatever riding goals you have set. The other great thing about the GWRHA show was the support the members gave every night from the stands as their fellow rider competed. The GWRHA show also had a class called the red shirt futurity for four-year-old horses that did not compete in their three-year-old year.  There were quite a few entries in this class and the GWRHA was really promoting this class for the future.

Rollback

To do a rollback you want to bring your outside leg back and away from the horse’s body to open the door for the horse to move through. You want your reins to come up and across the horse’s neck in the direction you want to turn. Your hand should point in the direction you want the horse to lope off in once they have rolled back. In order to get the horse to snap out into the lope after the roll back kick with both legs in the belly. The goal is to have the horse roll back on their hocks. To do that you need to be soft with your hands during the roll back and firm with your legs to get the horse to snap out into the lead departure. Once you have done this over and over the horse will learn to speed up on their own during the roll back in order to depart fast after the roll back.

Something we have never done before to get that snap out of the roll back was working with a cow flag. A few of the trainers have suggested trying it but we never had time to do it until we got to Nathan’s. The flag is shaped like a cow and is attached to a pulley system that runs back and forth along the wall. The idea is to give the horse something to follow in the roll back.  By working the flag, you are able to sharpen the stop, the roll back, and the depart in the opposite direction faster. My horse wasn’t sure of the cow flag at first but once he got the hang of it he started following that cow like a cutting horse. This was really fun for both of us and it also helped our roll back in the process.

Circles

Nathan likes to warm up for circles by trotting in a small circle.  From a small circle, you ask the horse to follow the path you chose for that circle. If the horse leaves that path, lay the outside rein, and move them back on the path of the circle. This is also done at the lope. Doing this exercise gets the horse sensitive to the neck rein, which teaches them to guide with very little pressure.

If a horse does not want to stay on the circle the other exercise you can do is to stop the horse and turn them around a few times and lope off. You want to turn them into the circle to teach them to follow it. You want to keep doing this exercise until the horse is soft in the face and following the circle with very little pressure from the outside rein. Click this link to watch the video explaining the circle exercise. Click this link to see video https://youtu.be/RMEurlwTr7w

Large Fast Circle

When running a large fast circle your hand position needs to be close to the horse’s neck and forward.  To guide the horse in the circle from that position Nathan likes to have his hand lined up with the horse’s inside ear. This position allows you to direct the horse without lifting up or pulling back on the reins. It also gives the horse a clear direction to follow because your reins are contacting a sensitive part of their neck.

Lead Changes

This exercise is done by making your circle into an oval shape. You want to lope off and start making your oval. As you come through the center of the arena on both of the long sides of the oval you want to pick up your reins and keep your outside leg on. This is how you set the horse for the lead change. You don’t want to do the lead change until the horse is relaxed and straight as you set up for the lead change. Once you have the horse soft and straight, go ahead and change leads. Once you change leads you want to remain in a counter canter circle. Doing the counter canter circle helps keeps the horse picked up and prevents the horse from dropping into the other circle. You can counter canter a few circles and then move into the circle onto the correct lead and repeat the exercise. This exercise helps teach the horse to relax through the center and not anticipate the lead change. It also allows the rider to practice the lead change in the center without the horse getting sour in the middle. Click this link to watch the video explaining the lead change exercise.C lick this link to see video   https://youtu.be/v_56fsgvjMk

Spooking Horse

If your horse is like mine and gets spooked by things moving outside the pen than you can use this technique. Nathan likes to make the horse look into the circle. If that isn’t enough than he makes a small circle and keep the horse looking into that circle. You can also break down to a walk and pump the horse’s face down until they are more focused on you and what you want than what they were looking at.

Turnaround

Nathan likes to trot a small circle in a counter bend to work on the turnaround. To do this you pick up your outside rein and bring it across and above the saddle horn. This bends the horse’s neck to the outside of the circle. The inside rein is back and just above your hip to help balance the horse’s face. Using your outside leg, push the horse’s hip to the inside of the circle. Doing this gets the horse’s front and back legs to cross over. After the horse has crossed over a few times release their head and let them turn in the direction they were crossing over to. So, if the horse was crossing to the right you want to turn right. This exercise helps get the horse to drive from behind for the turnaround. You don’t want the horse to only pull from the front on the turnaround. When you ask for the turnaround this exercise has conditioned the horse to use their whole body to execute the maneuver. Click this link to watch the video explaining the turnaround exercise. Click this link to see video  https://youtu.be/buFxHccptQ0

While in Kuna, ID I logged 9 hours of riding time toward the AQHA riding program. https://www.aqha.com/trail-riding/programs/aqha-horseback-riding-program

I hope you have enjoyed this blog and keep watching for more about our trip across the U.S. and all the great people and places we experience. Please share this with your friends.

For more information about Nathan Kent Performance Horses click on this link: http://www.kentperformancehorses.com/

Check out more reining horse trainers by clicking this link: https://horsetaillegacy.com/063o

Posted on 2 Comments

How to Ride Your Reining Horse Better with Jim and Linda Hitt Professional Horse Trainers, Elizabeth, CO

Professional Horse Trainers, Jim and Linda Hitt,

Elizabeth, CO

Jim and Linda have experience in multiple riding disciplines which was great to be exposed to. Jim focus is on training horses for trail competition and Linda is the reining trainer. Having the opportunity to ride with both of them exposed me to a verity of training techniques.

Reining Lesson with Linda Hitt

Transitioning from a large fast to a small slow first

Linda likes to think of the circle having spotting points in the shape of STOP sign. By thinking this way gives you the visual of the center of the circle being a straight line. Linda placed two traffic cones on each side of the center line. This created an alley way to guide through as you go from your large fast circle to your small slow. This add really helped me to stay straight through center and to time my transition to the small slow.

Lead Changes with Linda Hitt

The lead change exercise was a new one for me. We counter cantered around the outside of the arena being sure to stay away from the walls. After multiple times around the arena I would ask for the lead change by laying my outside leg on and releasing my inside leg and kissing for the lead change. This was done on the long straight line of the arena. I have to say I was not good at this exercise. Every time I took my inside leg off my horse thought I wanted him to stop.

Suppling Exercises with Jim Hitt

Jim likes to start his week by doing suppling exercises with his horses. He feels that these exercises help the horse become more balanced and helps the rider to be able to bend the horse in the pole, neck, shoulders, barrel and hips. When a horse is supple throughout their body we are able to place the horse where we want them to be in each maneuver.

The first exercise is done at the trot. You pick up your inside rein and bend the horse’s head to the inside and maintaining forward motion with your legs and the outside rein. Once the horse is bending well to the inside do the same bending to the outside of the circle by picking up the outside rein and maintaining forward movement with your legs and the inside rein. When doing this exercise the rein that is bending the horse’s neck is slightly higher than the non-bend rein. Keep both reins in front of the saddle horn while doing this exercise. You want the horse to pick their shoulder up and become round. They need forward motion to achieve that collection. Once the horse is moving well at moderate jog Jim likes to do the same exercise at what he calls the power jog. He asks for more forward motion and does the same bending. Doing this requires the horse to use their body more allowing them to self-collect. Jim also does this exercise at the power jog, which is a faster more forward trot.

Turning on the forhand at the trot

This exercise requires the horse to move their hind end around faster than the front end. To do this start by trotting a small circle. Than pick up the inside rein and bend the horse’s head to the inside and push the inside leg on the body to get the horse to cross their back legs over. Horses want to back up out of the exercise, so it is important to maintain forward motion as you move the horse’s hind end around. This link will take you to a youtube video of the exercise.  Click this link to see video https://youtu.be/nLCcf4KoF6w

Lead Change

We started out loping circles on the correct lead and that came through center and loped circle in the counter canter. While doing the counter canter you maintain the same leg and hand position as you had in the correct lead circle. Once you have loped a few circles on the counter canter come straight down the long side of the arena and place your outside leg on and open your inside leg and change your reins so that the new inside rein in slightly higher than the outside rein and ask for the lead change by kissing. Changing the rein position helps to lift up the inside shoulder and clears it for the lead change. This link with take you to a youtube video of the exercise. Click this link to see video https://youtu.be/vRxyqwPW2pY

While in Elizabeth, CO I logged 6 hours of riding time toward the AQHA riding program.

Please feel free to share this information with your friends.

For more information about Jim and Linda Hitt at Gambel Oaks Equestrian Center clink on this link: http://www.gambeloaks.com/index.html

Check out more reining horse trainers by clicking this link: https://horsetaillegacy.com/063o