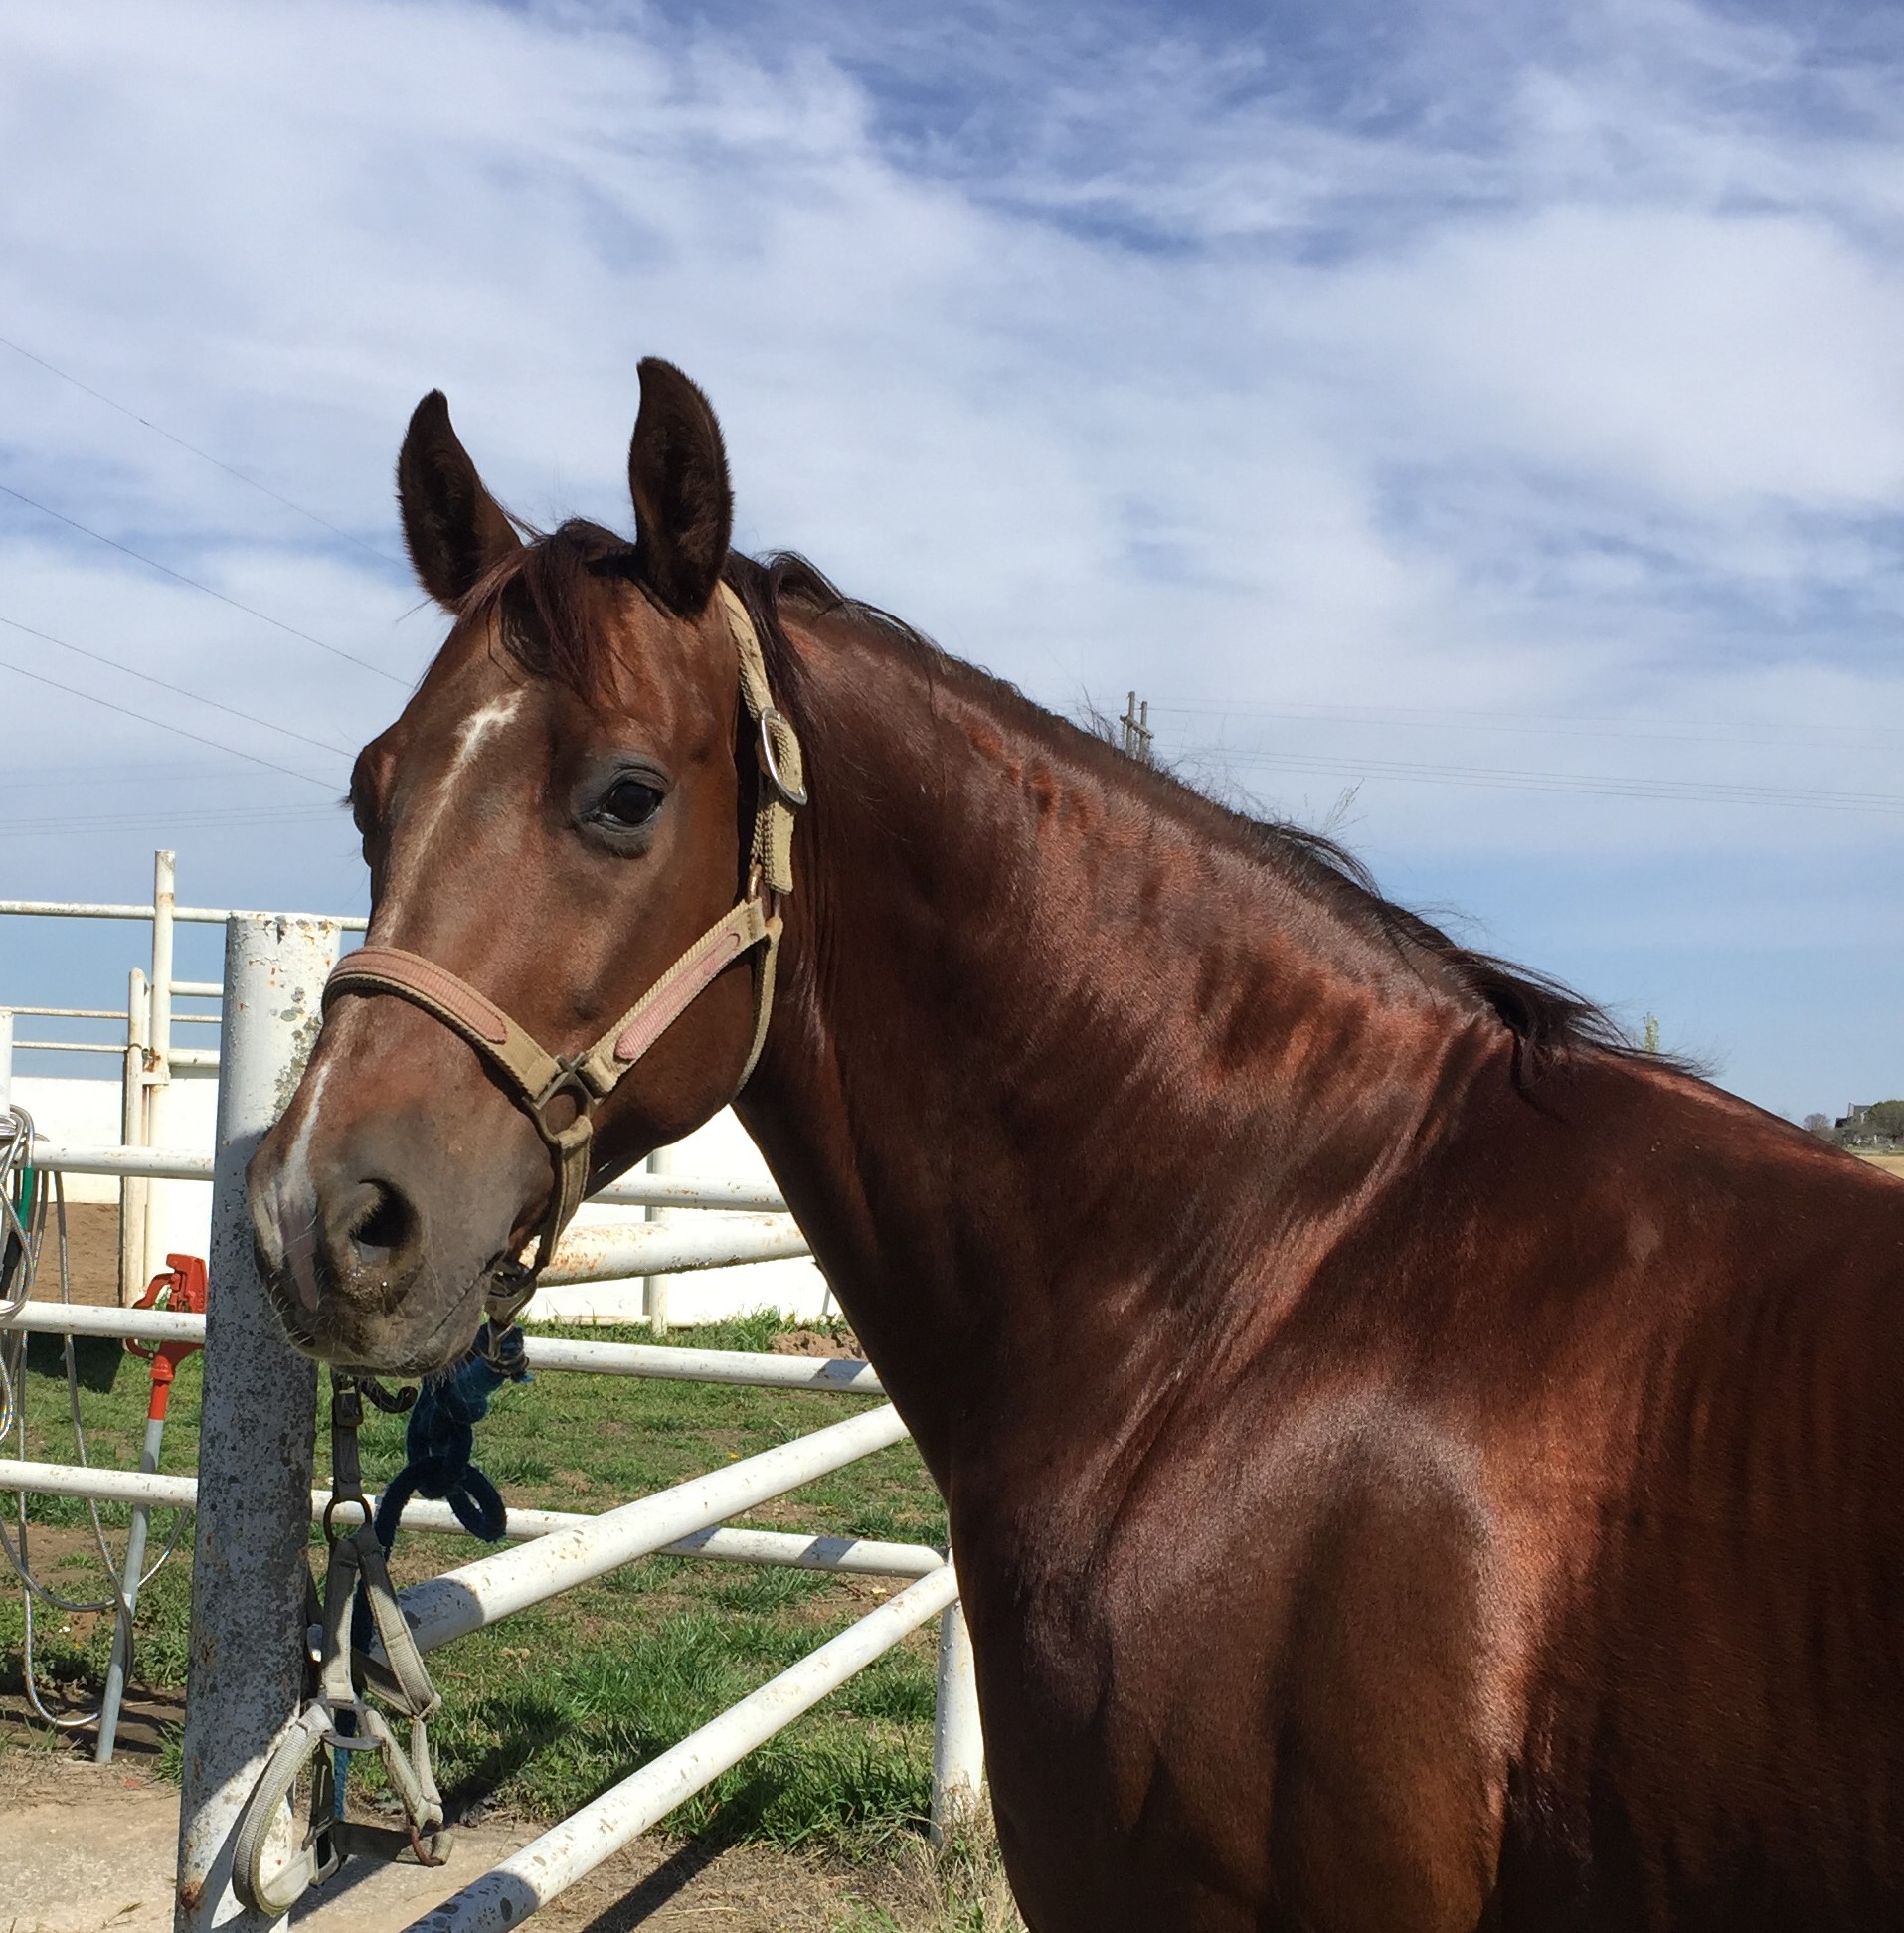
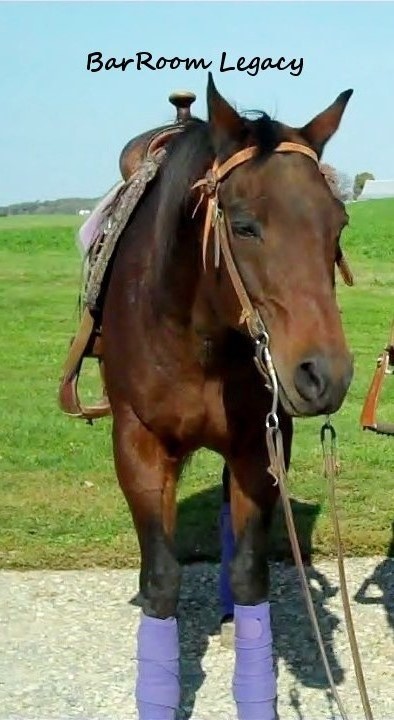
It has been a while since I have blogged for HorseTail Legacy LLC and my American Quarter Horse Irish (Heza Holi Surgarman). He is now 19 years old and living his best life in Florida. We ride almost every day at reining facility called Love To Ride Ranch. With every new trainer you are exposed to new products that help both you and your horse. So, my focus in these blogs are to bring you information about the changes I have made over time as well as my fellow riders.
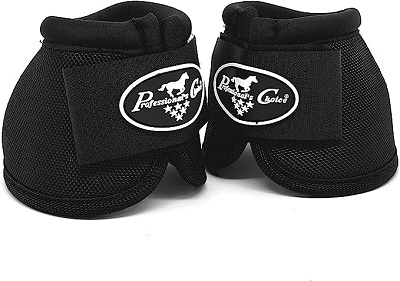
One product I have started using more is bell boots also known as over reach boots. As I have asked more of Irish in his turnarounds and stops it became clear that bell boots were needed. I started having front shoes get pulled off when stopping. I didn’t want to have that to happen often since he has a very thin hoof wall and pulling shoes breaks what little he has off. When he doesn’t have enough to nail too I have to go the glue on shoes which often increases my farrier bill. Irish is a good turnaround horse but even the best can catch themselves as the cross over so added protection is never a bad thing.
The product I like the best is Professional’s Choice Ballistic Overreach Bell Boots for Horses. I have tried two other brands and have found that this brand holds up the best. The construction is well thought out and the materials don’t cause any rubbing on my horse. The hook and loop holds well and they don’t rotate on the horse. I would buy this product again when the time comes
Durable and quick wrap style: These bell boots are designed to withstand the wear and tear of everyday use, making them a reliable choice for horse owners.
Hook & Loop closure: The convenient closure allows for quick and easy application, so you can get your horse ready for training or competition in no time.
Textured PVC outer layer: The added layer of protection helps to prevent interference and overreaching, ensuring the safety and well-being of your horse.
Neoprene interior: The neoprene absorbs shock, keeping your horse comfortable during use.
Soft lycra lining: The lining prevents rubbing, ensuring that your horse is comfortable while wearing these bell boots.
To have a good stop you must have a good run down. Start your lead departure by walking the horse forward with their head straight and in the bridle. After your first strides, you will be able to tell if the horse is soft and collected or if you need to work to get them that way. When you are working the rundown, forget the stop. Use the length of the arena, even if they break down, trot them up into the bridle to the end of the arena. Once the horse is straight you can start to ask for an increase in speed during the rundown. Only after the horse is going straight and you can rate their increase in speed should you say whoa and ask for the stop. Doing this teaches the horse to hunt the stop with their head down and their body round, as well as travel straight and wait for your cue to increase in speed.
Using two hands start out on the left lead across the pen on the diagonal. As you go, build speed while maintaining collection. Once you get to the half way point break down into a trot. Continue to the corner and counter bend a circle in the direction of the right lead at the trot. Now lope off in the right lead and do another diagonal breaking down to the trot to the corner and counter bend a circle in the direction of the left lead at the trot. As you are building down the diagonal you want to pick up your reins and hold them to maintain collection. Doing this helps teach the horse to pick up their back and stay collected as you drive to the stop. https://www.youtube.com/watch?v=HUChKea5TFA
Jay Dee Anderson
Run Down and Stop
Jay Dee likes to work on the run down and stop by doing a rectangle around the arena. The first step is to lope around the arena and make a small to medium size circle at the end of the arena. After doing that a few times he starts to build speed for the rundown and maintains that speed into the circle at the end of the arena. Once he has done this and the horse is straight and building well he will ask for the stop by saying whoa. The goal of the is exercise to prevent the horse from anticipating the stop and slowing down before you tell them to whoa. A good stop requires an increase in speed on a straight line with the last stride being your fastest.
Mack Weaver
Run Down and Stop
This exercise for the run down and stop helps keep the horse from running off after you turn the corner at the top of the pen. It also allows you to practice the maneuver without having to lope as much. Start by walking half way across the top of the pen and loping off. Once you turn the corner for the run down you want to see if the horse is waiting on you to go to the stop. If not turn the horse into a small circle and stay there until you feel the horse is listening to you. Once the horse is, go to the top of the pen and walk across half way and lope off and try it again. If the horse is waiting on you for the run down go ahead and continue down the pen and stop. Wait at the end of the pen for a minute or so and walk across the pen half way and lope of and repeat the exercise. https://youtu.be/V6iMIxrpyq4
Rein length is very important when it comes to getting a good stop. If your reins are too short the horse will not be able to drop their head and move as well in the stop. Short reins can cause you to pull on the horse’s face causing a jarring of bit in their mouth as well as stopping their forward motion. Mack likes to have a shorter rein around the top of the pen, but when he turns the corner for the run down he will shake out some rein so that the horse is on loose rein for the run down and stop.
Sean Johnson
The Run Down and Stop.
When you are running down to the stop you want to have your inside leg forward and your outside leg is used to bump for more speed if the horse does not respond to the kiss. You also want to be driving down into your heels and sit down and back in the saddle. The idea is to have your body already in the stop position and be behind the motion. Being in the stop position as you are running down allows your horse to go to the ground with their hind end and you to stay seated during the stop. When you are stopping a horse you also want to be aware of your reins. You can use them to moderate the speed if you need to but when you ask for the stop you really don’t want to pull back on the reins. Pulling back on the reins will stop the forward movement and result in a shorter stop that can be heavy on the front end.
As with everything in reining maneuver the approach to the stop is just as important as the stop itself. What we did was use the entire length of the arena as well as going around the ends. The advantage to this is you can practice speed control at the ends as well as squaring off your corners in preparation of the run down. Sean likes to practice the stop this way because it allows you to build for the stop but you are not always stopping every time. He feels that when you are sitting in stop position and squared your corner and building incrementally you are able to surprise the horse with the stop there by training the horse to stop only when asked.
I hope you have enjoyed this post and will share it with your friends.
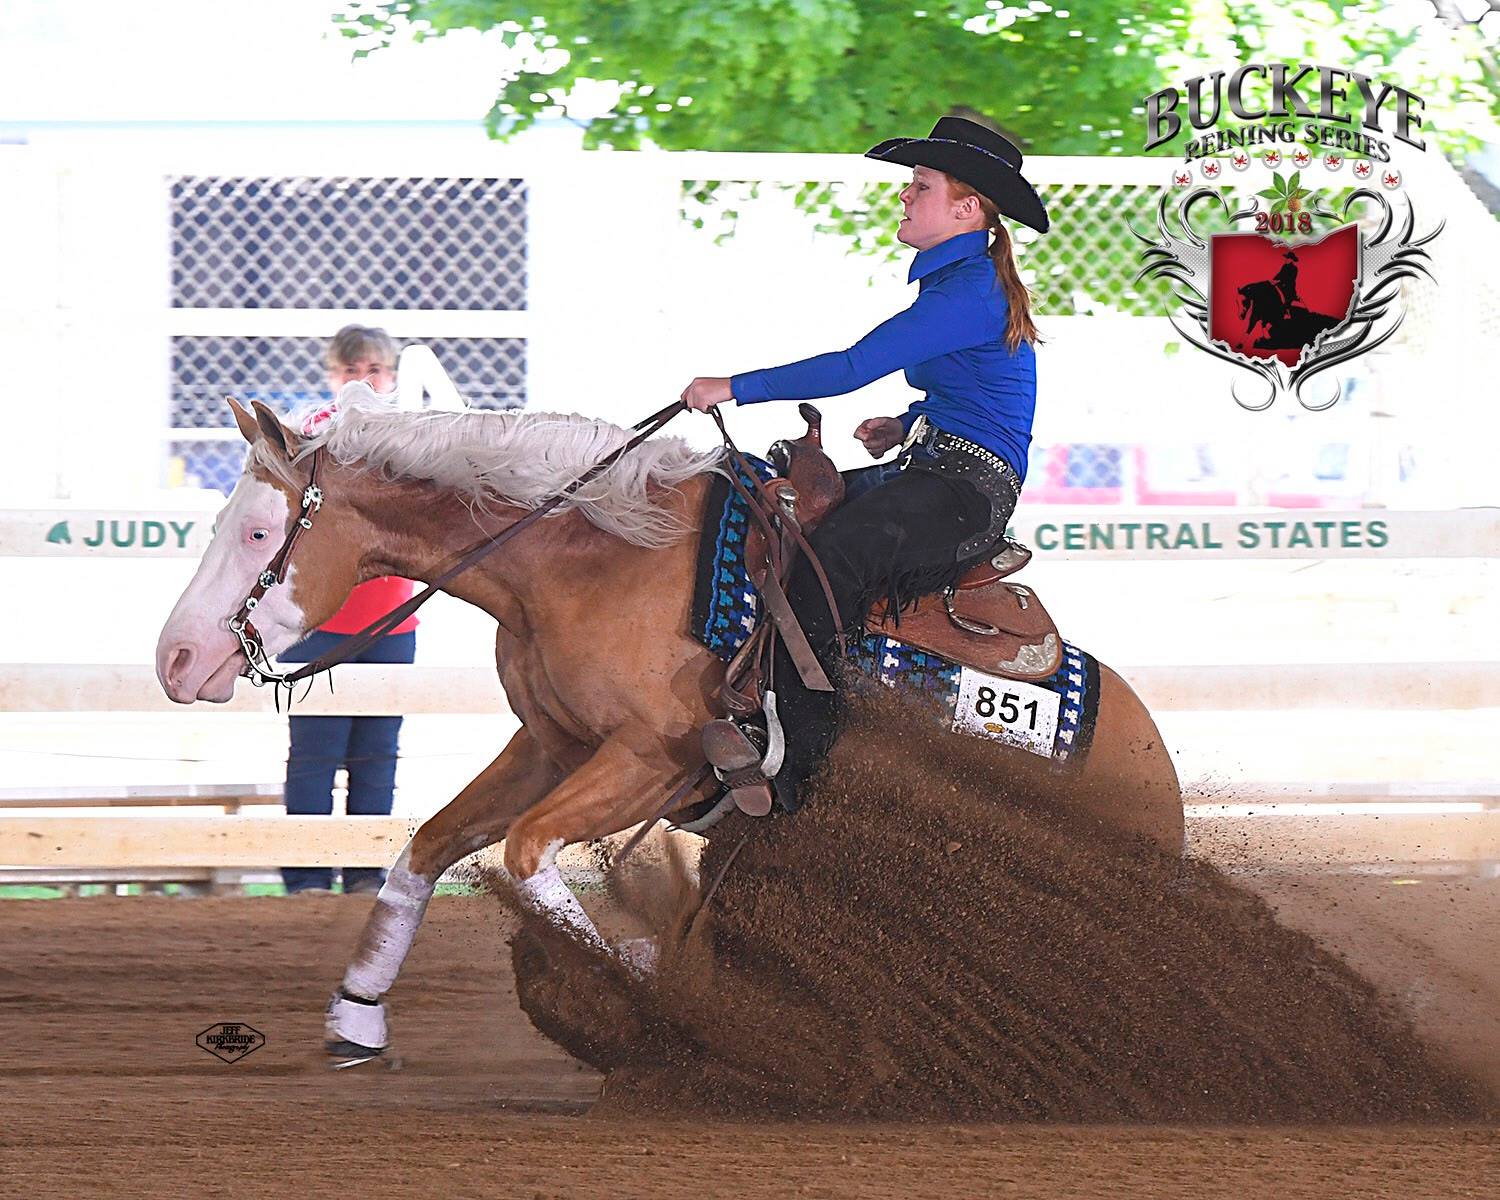
All images were provided by Maria Hurd and show case her daughters Amanda and Elena Hurd competing.
The lead change maneuver on a reining horse has always been one of the things that I didn’t practice a great deal so it made me nervous to do them. Working with these professional reining horse trainers help me look at the lead change differently. I was able to incorporate their techniques into my practice routine, which made doing lead changes just another maneuver instead of something I was uncomfortable practicing and doing. The bottom line is that we practice every other maneuver until we can do it in our sleep and the lead change shouldn’t be any different. Changing leads is a nature thing for a horse to do, all we are asking is for them to do it on cue.
Ashley Villmow
Lead Change
For this exercise, I made a figure eight shape around the arena. Starting on the correct lead I loped around one end and then turned to cut across the center of the arena on a diagonal into the other circle on the counter canter at the opposite end of the arena. I would then continue around and across the center maintaining the counter canter. Once at the opposite side of the arena I would be back on the correct lead. As I turned to cross the arena again I would ask for the lead change on the straight line just before or after I passed center. Once the lead change was done I continued around the circle and stopped as I started the next diagonal line across center. This exercise allows you to work on lead changes without the horse starting to anticipate the change. https://www.youtube.com/watch?v=btt6swO5Xec
Bobby Avila
Lead Changes in the Center
All reining patterns require a lead change in the center. We all need to practice changing leads in the center especially before a show. So how do you do this and prevent the horse from anticipating the lead change in the center. What Bobby does is practice the lead changes in the center of the circle until he is happy with the maneuver. Than he finishes the practice with circles and no lead changes, there by taking the lead change out of the circle at the end so the horse is not thinking circle always means change leads in the center.
Brandy Murphy
Lead Changes
When doing a lead change, you want the cues to be very simple. This exercise is done in a counter canter circle. As you circle you want the keep your outside leg off the horse and your inside leg is used to push the horse’s hip over and maintain the counter canter. Continue to lope around like this until the horse is following the circle well. When you are ready to change leads simply close your outside leg on the horse and open your inside leg to ask for the lead change. Doing the lead change this way sends a clear message to change leads when your legs change position. https://www.youtube.com/watch?v=_aOyNxd-ots
Bruce Barber
Lead change
Counter cantering a circle is a great exercise to work on the lead change. Normally a horse wants to be in the correct lead on the circle so it becomes a natural movement for them to change to the correct lead when asked. It is important to stay in rhythm with the horse and to ask for the lead change by softening the horse’s chin and changing your weight into your outside hip and step through the change by placing your outside leg on and releasing the inside leg and clucking. This allows the horse to change into the correct lead for that circle while allowing you to practice the lead change.
Dallas Cunningham
Lead Changes
For the lead change Dallas prefers to keep it as simple as possible. He feels that the horse should be able to change leads whenever they are asked. In keeping with that philosophy, he does not do much in the way of setting the horse up. He leaves his hand down and asks for the lead change by changing legs. To practice this, we loped a counter canter circle and maintain light leg pressure to maintain the counter canter. Once the horse was moving well we simply changed legs to get the horse to change to the correct lead. Dallas feels this method helps take the anticipation out of the lead change because the horse never knows when it is coming. https://www.youtube.com/watch?v=IfAEdOtqTHY
Jay Dee Anderson
Lead Changes
For a horse to do a lead change easily they need to be straight, collected and moving forward. This simple counter canter exercise helps you achieve all three. Jay Dee likes to counter canter a square at one end of the arena. Doing a square gives you four straight lines to use to change leads. The corners also allow you to practice squaring off your straight lines which you need to do to get a good rundown for the stop. Once he has done a number of squares he will ask the horse to lead change. Because you are riding in a square it also helps teach the horse to change leads and stay straight.https://youtu.be/2ZTneQSUrOc
Linda Hitt
Lead Changes
The lead change exercise was a new one for me. We counter cantered around the outside of the arena being sure to stay away from the walls. After multiple times around the arena I would ask for the lead change by laying my outside leg on and releasing my inside leg and kissing for the lead change. This was done on the long straight line of the arena. I have to say I was not good at this exercise. Every time I took my inside leg off my horse thought I wanted him to stop.
Mack Weaver
Lead Changes
Mack believes that you have to practice lead changes to be able to feel comfortable doing them. The way he does this is by making the center line anywhere down the length of the arena that crosses the middle of the pen. Making the center a different place allows you to work on the lead change in such a way that the horse will not anticipate the lead change. He likes to set the horse up as he comes through center by picking up on the reins and getting the horse straight through center. Doing this on the correct lead and the counter canter over and over until the horse is relaxed with coming through center and has their body straight. Once they are relaxed he will ask for the lead change but he will continue in the same circle on the counter canter. Staying in the same circle helps prevent the horse from dropping into the opposite circle after the lead change. https://www.youtube.com/watch?v=zEua8RgiToU
Mike Davis
Lead Change
Before loping off pick up on the reins to let the horse know that they are about to do something. Than lope a few circles picking up on the horse through center to get them to straighten up. Once the horse is picking up well than move on to the main exercise. The exercise is started by loping a straight line down the length of the arena. At the top make a counter canter circle and cross the arena picking up as you cross the middle. Continue around on the counter canter to the top of the arena and turn to go on a straight line to the opposite end of the arena. Repeat this pattern a few times picking up on the horse when on the straight lines down the center and across the middle of the arena. Once the horse is picking up and moving smoothly change legs and ask for the lead change. This exercise works well because the horse does not anticipate the lead change and all the time spent picking them up allow them to change leads smoothly. https://www.youtube.com/watch?v=rKWK7YOA_E4
Nathan Kent
Lead Changes
This exercise is done by making your circle into an oval shape. You want to lope off and start making your oval. As you come through the center of the arena on both of the long sides of the oval you want to pick up your reins and keep your outside leg on. This is how you set the horse for the lead change. You don’t want to do the lead change until the horse is relaxed and straight as you set up for the lead change. Once you have the horse soft and straight, go ahead and change leads. Once you change leads you want to remain in a counter canter circle. Doing the counter canter circle helps keeps the horse picked up and prevents the horse from dropping into the other circle. You can counter canter a few circles and then move into the circle onto the correct lead and repeat the exercise. This exercise helps teach the horse to relax through the center and not anticipate the lead change. It also allows the rider to practice the lead change in the center without the horse getting sour in the middle. Click this link to watch the video explaining the lead change exercise. https://www.youtube.com/watch?v=v_56fsgvjMk
Steve and Dori Schwartzenberger
Lead Changes
We started the lead change exercise by counter cantering the circle. The advantage to the counter canter is that it helps the horse to frame up and stay in shape themselves. Once in the counter canter circle you want to have the horse’s head and body following the circle as if they are in the correct lead. By doing this it helps keep the horse’s shoulder picked up before you ask for the lead change. Having the horse following the circle as if they are the correct lead keeps the lead change simple for the horse. Their body is already following the circle so all they have to do is change their feet and they are in the correct lead.
I hope you have enjoyed this post and will share it with your friends.
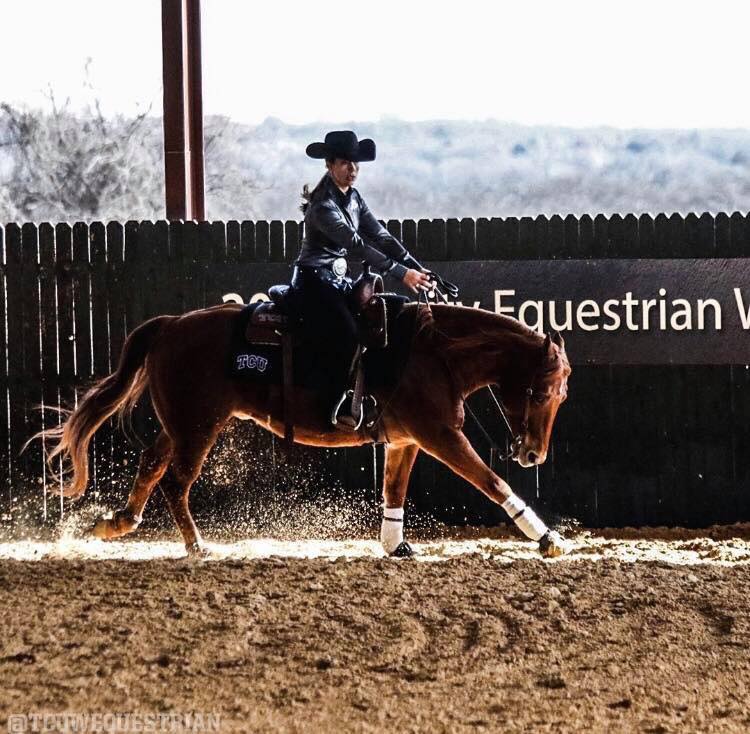
All images were provided by Maria Hurd and show case her daughter Elena Hurd competing.
My horse likes to hang his right shoulder out in the left turn around. I have used many different exercises to improve his reach in the left turn around, but have found that he improves for a while but then he goes back to hanging his shoulder out again. Bobby’s approach was to allow the horse to correct himself. The way we did this was by placing my right leg forward so when he hangs his shoulder out he would hit my spur. The advantage of this is the horse learns to reach with his shoulder because he wants to avoid hitting the spur not because you are spurring him. Again, teaching the horse what is right and giving him the ability to make the right decision
Brandy and Terri Murphy
Turnaround
There are two exercises that we worked on for the turnaround. For the first exercise, you start by walking the horse in a small circle. While you are doing that you lay the outside rein on the horse’s neck and bump the inside rein out and slightly back to get the horse to point their nose to the inside. This helps get the horse back on the inside rear foot as well. Once the horse is responding to the outside neck rein you can ask for the turnaround. When you are working the turnaround, you want to walk or trot out of the maneuver to make the horse work harder outside the turnaround. This helps get the horse to hunt the turnaround since it is less work.
The second exercise is designed to keep the horse in the correct frame during the turnaround. With one hand on the reins start trotting a circle. Than take your free hand and close it over the reins at the level of the horse’s neck. Using both legs bump the horse’s belly to get them collected up and straight. Once the horse is collected ask for the turnaround by bumping only with your outside leg. Be sure to maintain the same hand position so the horse remains in the collected frame. This helps teach the horse not to throw their head up or turn their nose out when they are asked for the turnaround. https://www.youtube.com/watch?v=eUmwszMd5EU
Dallas Cunningham
Turnaround
This turnaround exercise helps develop a snappier turn by teaching the horse to move their inside front leg back and their outside front leg to push off and cross over. Start the exercise by trotting a small circle with your inside rein up and slightly forward and your outside rein on the horses’ neck. If the horse is leaning to the outside with their shoulder, you want to bump your outside leg to get their shoulder to commit and then ask for the turnaround. Once they are turning well, trot out to a small circle again and repeat the exercise until the horse will commit to the turn as soon as you lay the outside rein on their neck. https://www.youtube.com/watch?v=x7GQlJD1Kek
Jay Dee Anderson
Turnaround
Before you ask the horse to turnaround you need to work on collection. Jay Dee does this by walking a small circle. He pushes the horse’s hip into the circle with his outside leg. With two hands, he picks the reins up in a “V” shape and bends the horse’s neck to the inside of the circle. He uses his inside leg to prevent the horse from dropping into the circle or turning. This exercise helps pick the horse’s front end up and teaches them to turn without sticking their nose out. The more collected the horse is in the turnaround the easier it is for them to cross their legs over and turn smoothly.
Starting the turnaround. Jay Dee trains his horses to turnaround as soon as he lays the outside rein on their neck and kiss. He does this so that when anyone gets on the horse they don’t need to think about the turnaround, they just need to lay the outside neck rein and kiss and the horse will turn. In addition, he feels using your outside leg to start the turnaround often causes the horse to look in that direction instead of keeping their head looking in the direction of the turnaround. He keeps his outside leg next to the horse’s body but does not squeeze with it. If he needs more speed he will bump with the outside leg and kiss. To stop the turnaround, he says whoa and puts his hand down. He does not like to stop every turnaround, but likes to walk out into a small circle, this help keeps the horse from anticipating the shut off of the turnaround and work on collection. https://youtu.be/qtFdCeZz_6g
Mack Weaver
Turnaround
On an older horse, Mack works a lot on their start. He wants the horse to move off the neck rein as soon as he lays it on their neck. If they don’t move than he will pull them around and stop and ask again until they start to respond to the neck rein as soon as they are asked. https://www.youtube.com/watch?v=XIiWVo-81lA
Mike Davis
Turnaround
Irish tends to tip his nose to the outside during his turnaround which makes it harder for him to cross over in the front. Mike feels that the reason he does that is because he is trying to move off the pressure from the outside leg and the more pressure the more he tips his nose out. To fix this he works on lifting the horses front end up as they are trotting around in a small circle by picking up with the reins. At first you will need to exert a good deal of pressure to get the horse to lift their front end but as you lift and release over time the amount of pressure needed will decrease until the horse is lifted enough in the front end to be able to cross over smoothly.
Nathan likes to trot a small circle in a counter bend to work on the turnaround. To do this you pick up your outside rein and bring it across and above the saddle horn. This bends the horse’s neck to the outside of the circle. The inside rein is back and just above your hip to help balance the horse’s face. Using your outside leg, push the horse’s hip to the inside of the circle. Doing this gets the horse’s front and back legs to cross over. After the horse has crossed over a few times release their head and let them turn in the direction they were crossing over to. So, if the horse was crossing to the right you want to turn right. This exercise helps get the horse to drive from behind for the turnaround. You don’t want the horse to only pull from the front on the turnaround. When you ask for the turnaround this exercise has conditioned the horse to use their whole body to execute the maneuver. Click this link to watch the video explaining the turnaround exercise. https://youtu.be/buFxHccptQ0
Patti Cusker
The Turnaround
Patti’s approach to the turnaround it to ue the horse by turning your head in the direction she wants to turn, as well as opening her inside leg and putting pressure on the horse with her outside leg. She uses very light contact with the outside rein to start the turn and prefers to say whoa to stop the turn. The goal for teaching the horse to turn using more body and leg pressure is to be able to turnaround without pulling on the horse’s mouth. The overall result is a responsive horse with a very soft face.
For my turnaround, we worked on keeping my horse head position correct. He likes to turn his nose to the outside of the turn. When he does this, it hinders his ability to cross his front legs over in a smooth cadence. In keeping with Patti’s soft hand approach to training I would use my free hand to lightly pick up the inside rein and drop it to get his nose to straighten up. This is a soft movement just like tapping someone on the arm to get their attention. The end result was a smooth turnaround with more natural speed.
Sean Johnson
Turnaround
The turnaround requires the horse to cross their front outside leg over in front of the inside leg. The outside shoulder cannot be pushing to the outside or the horse will not cross over well. To work on this start trotting your horse in a small circle and guide their nose by pulling your inside rein out and holding it there. Continue to trot like this until you feel your horse’s shoulder and neck commit to the circle. Once they commit to the circle open your inside leg and lay your outside rein and turnaround. While turning pull your inside rein out and kiss and release. The horse should increase in speed every time you kiss. If the horse does not increase its speed bump them in the outside shoulder and pull your inside rein out and kiss all at the same time. Do this for multiple revolutions and then trot out into the small circle and repeat the exercise. After doing this exercise in both directions and you feel the horse is crossing over well and is committed to the turnaround you can go ahead and do the turnaround maneuver in both directions.
Sean likes to start the turnaround by opening the inside leg and rein and laying the outside rein on the neck and outside leg on the body. He does not like to kiss to start the turnaround because he feels it can create a more abrupt start. Once the horse has taken three steps he kisses once for more speed and then again for each increase in speed. If the horse does not increase in speed he will bump the horse with the outside leg or both legs as well as kissing. If they speed up with every kiss, reward the effort by stopping the turnaround and let them rest. If you would like to see my video recording of Sean explaining turnaround exercise check out my you tube link. https://youtu.be/ouDRj7xYR3g
Steve and Dori Schwartzenberger
Turnaround
For this exercise, we trotted a small circle with the horse’s front end squared up. Once the horse is collected up and lock into the circle ask for one or two turns and trot out into the small circle again. Continue to do this exercise and ask for more turns each time. Soon the horse will be hunting the turn around and crossing over correctly in the front and planting the pivot foot behind.
The interesting thing about the turnaround that I learned was that the inside front leg needs to step laterally to allow the outside front leg to cross over. To help teach the horse to step laterally with their inside leg you want to bring your inside rein over your inside knee and lay the outside rein on the horse’s neck. This will cause the horse’s inside leg to follow the inside rein. The result will be a clean cross over with the outside front leg.
I hope you have enjoyed this post and will share it with your friends.
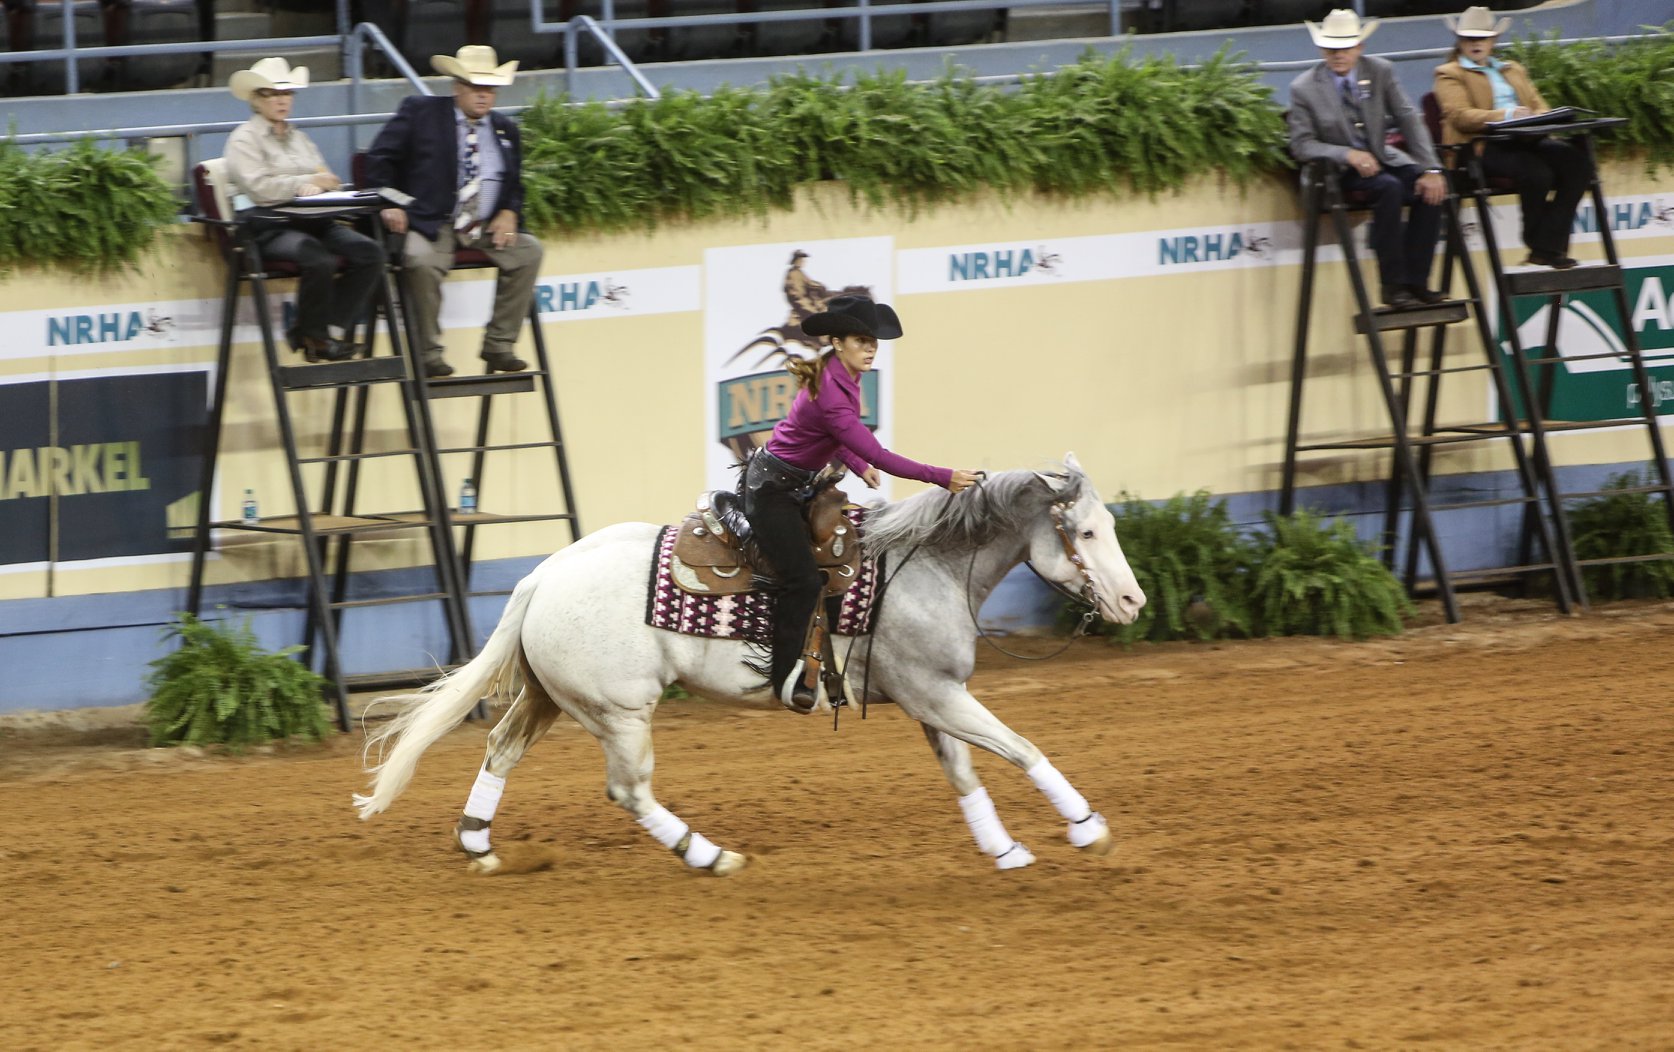
Feature image was provided by Maria Hurd and show cases her daughter Amanda Hurd competing.
This blog presents exercises used by professional reining horse trainers to teach and perfect the rollback maneuver. As with every aspect of reining the rollback is a finesse maneuver. I feel it tests the communication the rider has with the horse. The horse is running to a sliding stop which really gets the adrenaline pumping and then the horse has to come back to the rider and rollback precisely and quietly lope off in the opposite direction.
The National Reining Horse Association definition of the rollback. “Rollbacks are the 180-degree reversal of forward motion completed by running to a stop, rolling (turning) the shoulders back to the opposite direction over the hocks and departing in a lope, as one continuous motion. The NRHA Handbook states no hesitation; however, a slight pause to regain footing or balance should not be deemed hesitation. The horse should not step ahead or backup prior to rolling back.”
Ashley Villmow
Rollback
Taking a page from Ashley’s cutting horse background she used her horse Augie to incentivize Irish to depart out of the rollback faster. We lined both horses up parallel to each other, then backed them up so they had their weight on their back end. Ashley would than roll Augie back toward me and lope off down the straight line. I would have to shadow her by rolling Irish back toward her and chase them down the straight line and stop. Doing this exercise really helped get Irish to snap out of his rollback and depart more quickly in the opposite direction.
Bobby Avila
Rollback
When a horse rolls back you want their inside leg to reach forward when they lope off. Moving your inside leg forward to creates more forward motion allows the horse to extend their stride. The extend stride creates a better lead departure out of the rollback. The object of the rollback is for the horse to turn inside out and lope off in the opposite direction. You must move your hands so they are creating the alley way toward the direction you want to go. For the rollback that alley way is back over the horse’s hip to complete the rollback.
When Bobby is teaching a horse to rollback he lopes it across the narrow part of the pen stops and turns and lopes off over and over until the horse understands what is expected of him when he stops. This condition the horse to think stop and turn. Bobby than makes the horse stop stay square and back up and turn and lope off. At the end of the practice session he will stop and stand and then walk off. By doing this final step the rollback is taken out of the stop and communicates to the horse that they are only to turn when you ask.
Brandy and Terri Murphy
Rollback
This exercise is designed to work on the rollback without having to do the rundown and stop. Start by walking your horse forward a few steps and then open your legs to stop them. Back the horse up a few steps than put your hand down. Start the rollback by looking in the direction you want to go. Next, pick your hand up and back towards the new direction. Wait a few seconds to let them figure out what you want then squeeze with your outside leg to get them to follow through with the rollback. If they continue to lag, make them turnaround a few times and start again. You can also trot them around in a small circle, pushing them into the bridle. Once you have built up the energy, stop, back the horse up and ask for the rollback. Continue to do this until the horse starts to snap through the rollback.
The key to a good rollback is to stop squarely, wait, look in the direction you want to go while drawing your rein back at the level of your hip and follow through by asking for the lead departure in the opposite direction with your new outside leg. To practice this Dallas, like to lope around the arena and ask for the rollback at any time. He believes the horse needs to be able to rollback when ask as if they are chasing a cow.
We did two exercises to help improve the rollback and departure. The first was to back the horse up in a small circle. With the outside leg, we pushed the horse’s hip into the circle. At the same time, we pick up the reins with both hands and bend the horse’s head slightly to the outside. This exercise helps clear the hips and the shoulder in preparation for the rollback. Once you have done this and the horse is moving well ask the horse to rollback to the outside of the circle.
The next exercise for the rollback is done in the circle. Jay Dee lopes around in a circle and stops and rolls the horse back. This teaches the horse to roll completely around into their tracks and drive out in the other direction. https://youtu.be/CpgzCaQLp2o
Mack Weaver
Rollback
There are four steps to think about when doing a rollback.
The run down
The stop
The release – is after the stop and you allow the horse to stand up briefly and you release their face.
The rollback – is when your hand, shoulders, and head all turn in the direction you want the horse to go.
As you turn around in the rollback you want to use your new outside leg to push the horse through the maneuver and lope off in the opposite direction. If the horse lays on your outside leg you want to turn them around a few times and then lope off in the opposite direction.
If your horse is slow departing after the rollback you can try this exercise to help your horse to move through the rollback and depart. Have someone pretend to be a cow. When you do this your horse’s head needs to stay even with the person as you travel up and down a parallel line to the person. The idea is to have your horse shadow the movements of the person. So, if the person backs up or turns or runs off you need to do the same thing with your horse. https://www.youtube.com/watch?v=lm2Ayg34OOo
Mike Davis
Rollback
We worked on two exercises to improve the rollback. The first was done on the circle. Start by loping off in a circle and then stop, wait, backup, look in the direction you want to go, bring your hand to your outside hip, open your outside leg, and follow through with the lead departure with your new outside leg. If you want to work on the rollback in one direction, stop in the middle then you can rollback in the same direction over and over as you circle around the pen. This exercise also helps with speed control in the middle of the pen and teaches the horse to relax in the middle as well. https://www.youtube.com/watch?v=X6rqRQn1G5Q
Nathan Kent
Rollback
To do a roll back you want to bring your outside leg back and away from the horse’s body to open the door for the horse to move through. You want your reins to come up and across the horse’s neck in the direction you want to turn. Your hand should point in the direction you want the horse to lope off in once they have rolled back. In order to get the horse to snap out into the lope after the roll back kick with both legs in the belly. The goal is to have the horse rollback on their hocks. To do that you need to be soft with your hands during the rollback and firm with your legs to get the horse to snap out into the lead departure. Once you have done this over and over the horse will learn to speed up on their own during the rollback in order to depart fast after the rollback.
Something we have never done before to get that snap out of the roll back was working with a cow flag. A few of the trainers have suggested trying it but we never had time to do it until we got to Nathan’s. The flag is shaped like a cow and is attached to a pulley system that runs back and forth along the wall. The idea is to give the horse something to follow in the rollback. By working the flag, you are able to sharpen the stop, the rollback, and the depart in the opposite direction faster. My horse wasn’t sure of the cow flag at first but once he got the hang of it he started following that cow like a cutting horse. This was really fun for both of us and it also helped our rollback in the process.
Patti Cusker
The Rollback
We started the rollback exercise by trotting a small circle next to the fence. Once you have done a few circles you want to stop your horse at about a 45-degree angle to the fence. The fence helps to direct the horse in the opposite direction. You ask for the rollback by looking in the direction you want to go and laying your inside rein on the horse’s neck. At the same time, you open your outside leg and push the horse through the rollback with your inside leg.
Patti likes to sit deep in the saddle and drive the rollback with her legs. She feels that if you pull too much with the reins it causes the horse to drag in the rollback. So, she likes to get light contact with the horse’s mouth when she asks for the rollback. The drive for the rollback comes from her seat and her inside leg. When you do a rollback, you need the horse to move their shoulders as well as their hips in the direction of the rollback. By maintaining a deep seat, you can stay balanced through the rollback and feel if the horse is engaging their hips to drive out of the rollback. If your horse doesn’t engage their hips you want to stop the forward motion and pick the horse up in the front end to move their shoulders and move their hips with your leg into a two-track until their shoulders and hips are moving together. Than go back to the exercise and ask for the rollback again.
Sean Johnson
Rollback Exercise
I like to call this exercise the mental gymnastics exercise. This exercise is designed to help load the outside hock in preparation for the rollback and lead departure in the opposite direction. To do this exercise for the left rollback, start backing in a circle to the right. Pick up your left hand and keep right hand slightly lower. The hand position is the same as when asking for the rollback. Your left leg should be on the cinch and your right leg is behind. As you are backing up look slightly over to the left. Once the horse starts to soften in the backing up, start to lower your hand and keep backing up. Then ask for the rollback by bringing your hand to your left shoulder and turning your head and shoulders in the direction you want to lope off. To do a right rollback reverse the backup direction and the hand and leg position. The way I think of the leg position is to place them where they would be if I was doing a simple rollback but adding in backing circle as a windup before the release. These videos will demonstrate how to do the exercise. https://youtu.be/fDDcU5aC6Xkhttps://youtu.be/nxqXJcQKkXU
A few other thoughts about the rollback.
In practice it is good to ask for the lope off a step or two past your line. This helps teach your horse not to anticipate loping off down the line since they are not conditioned to only rolling back to a set spot every time.
Think of the rollback as a quick movement, that needs the rider to move slowly to achieve a smooth maneuver.
I hope you have enjoyed this post and will share it with your friends.
Circling a horse sounds easy enough, but it takes training and practice to achieve the perfect circle. The information here outlines how professional reining horse trainers teach their horses to circle.
National Reining Horse Association Handbook definition of circles
“Circles are maneuvers at the lope, of designated size and speed, which demonstrate control, willingness to guide, and degree of difficulty in speed and speed changes. Circles must at all times be run in the geographical area of the arena specified in the pattern description and must have a common center point. There must be a clearly defined difference in the speed and size of a small, slow circle, and a large, fast circle; also, the speed and size of small, slow right circles should be similar to the small, slow left circles; and the speed and size of the large, fast right circles should be similar to the large, fast left circles”
Bobby Avila
Our horses are trained to be responsive to our body ques. When you ride a circle, you want to ride spotting 1/8 of the circle at a time. If you ride too far ahead of your horse it becomes difficult to maintain a consistent circle. An older horse knows how to stay under your hands and follow the circle however, if they make the back decision to lean in or out of the circle Bobby likes to correct this by turning the horse sharply across the circle and then get back on the circles’ path. These two techniques helped my circles a great deal. It also helps reduce the need to continually pick up my hands to guild him to do what he already knows my horse throughout my circle. The more we did this the better he stayed between my hands and on the path of the circle.
Fast Circle to Slow Circle Transitions
The transition from a fast circle to a slow circle requires rhythm. The approach was to ask the horse to increase his speed until he and I were in a comfortable rhythm and to maintain that. Once I had the rhythm, it became a matter of transitioning down by putting wait into my feet and sinking down into my saddle and maintaining the rhythm to create a smooth transition to a slow circle. The end result was a much smoother looking transition in which I was in rhythm with my horse at each speed.
Brandy Murphy
Fast to Slow Circles
When transitioning from fast to slow circles you need to build in the cues that signal the horse to make the change in speed. Start by loping a circle and when you want to slow down start to hum, pick up your hand as they start to come back to you drop your hand. Use your outside leg to push the hip into the circle. Then once they come back, you want to stop them. This conditions the horse that when they hear the hum they think stop. Once they understand the cues, then move on to the transitioning from fast to slow circles. Be consistent and your horse will learn how to transition smoothly.
As you circle you will feel when the horse is leaning as soon as you feel it stop the horse, back them up and rollback and depart. Timing the work to happen as soon as the lean occurs is important so the horse connects the work with the leaning.
This exercise helps the horse learn how to stay on the circle willingly. The exercise can be done at the trot and the lope. The goal is to make the horse work when they lean. Once they understand that it is less work to stay on the circle you have taught them to be more willingly guided.
Jay Dee Anderson
Lead Departure and Building Speed in the Circle
For the lead departure Jay Dee picks up the reins and applies light pressure to the bit and asks the horse to lope off. After a few strides, he breaks the horse down to a walk and repeats the process. This teaches the horse to allow you to pick up on the reins and to keep their head down in the lead departure. The next step is pick up on the reins and increase the speed by kissing and bumping with your legs. This technique allows you to pick on the horse in the show pen to increase speed while remaining collected. Once he has the speed he wants he puts his hand down and bumps with his legs and kisses to speed the horse up if they start to slow down. https://youtu.be/yK2rGjiH84M
Linda Hitt
Transitioning from a large fast to a small slow first
Linda likes to think of the circle having spotting points in the shape of STOP sign. Thinking this way gives you the visual of the center of the circle being a straight line. Linda placed two traffic cones on each side of the center line. This created an alley way to guide through as you go from your large fast circle to your small slow. This added visual really helped me to stay straight through center and to time my transition to the small slow.
Mack Weaver
How to keep your horse on the circle when riding one handed. Start by keeping your hand in line with the center of the horse’s mane and keep your shoulders square. Look in the direction you want your horse to go. Your horse should stay on the path you are looking toward. If the horse leaves the circle to the outside you want to stop the horse and turn the horse around to the inside of the circle. Lope off, then cut the circle in half so that you get back to the spot the horse left the circle faster. Frequent repetition allows you to correct the horse in the trouble spot. https://www.youtube.com/watch?v=7UGWl3dW5TY
Nathan Kent
Nathan likes to warm up for circles by trotting in a small circle. From a small circle, you ask the horse to follow the path you chose for that circle. If the horse leaves that path, lay the outside rein, and move them back on the path of the circle. This is also done at the lope. Doing this exercise gets the horse sensitive to the neck rein, which teaches them to guide with very little pressure.
If a horse does not want to stay on the circle the other exercise you can do is to stop the horse and turn them around a few times and lope off. You want to turn them into the circle to teach them to follow it. You want to keep doing this exercise until the horse is soft in the face and following the circle with very stride.
Large Fast Circle
When running a large fast circle your hand position needs to be close to the horse’s neck and forward. To guide the horse in the circle from that position Nathan likes to have his hand lined up with the horse’s inside ear. This position allows you to direct the horse without lifting up or pulling back on the reins. It also gives the horse a clear direction to follow because your reins are contacting a sensitive part of their neck.
Sean Johnson
Sean explains that it takes another half circle before the error becomes evident. So, if your horse is not coming through center on a straight line, the error occurred half way back on the circle, not at the center. Thinking this way was a great insight into where the mistake really started and that the correction should be made back when the mistake was created and that would prevent the mistake that became evident halfway around the other side of the circle.
The goal of the reining circle is to have the horse willingly guided and if you are helping them all the time they are not willingly guided. You want the horse to do more work than you. If you want to teach the horse to lock into the circle, only correct them when they make the mistake. If they leave the circle guide their nose to the inside with your inside rein at the same time bump with your outside leg. Once they are following the circle bring your hands back to center and let the horse follow the circle. If the horse is dropping into the circle guide them to move out by opening your outside rein and bumping with your inside leg. After working on this my horse started to move more freely and was locking into the circle on his own.
Circling can become monotonous for both you and your horse. You really want them to be waiting for what comes next. A great way to do that is to add a stop and a turnaround to the outside and loping off in the opposite direction. This one exercise helps sharpen up the circles, the turnaround, the roll back, the stop, and the lead departure.
Steve Schwartzenberger
What to do if your horse is looking out of the circle.
If a horse is looking out of the circle you want to use your inside rein and bend the horse at the pole by bring your inside rein back and up to your hip. Keep your forward motion as you ask for this bend and continue to ride half way around the circle and release the rein so the horse is following the arch of the circle. Continue to do this until the horse understand that they are to follow the circle without looking out.
I hope you have enjoyed this post and will share it with your friends.
All images were provided by Maria Hurd and show case her daughters Amanda and Elena Hurd competing.
Riders spend a great deal of time training and caring for their horses and it only stands to reason that quality in the products that are used on our horses is a must. The products that I am reviewing here are: CSI Saddle Pad, Nose – It Equine Ball, Ta – Ta Dandruff Treatment Shampoo. I have also added in a fashion review of a Women’s Vintage classic equestrian watch just for fun.
CSI Saddle Pad
I bought my CSI saddle pad in 2013 at “The Road to The Horse” event in Lexington, KY . I was looking for a quality pad for my aging American Quarter Horse Legacy. I stopped by the CSI booth and really liked the design concept of the pad as well as the quality materials that are used to make the pad.
I want my horse to be comfortable while I am riding him and the CSI Flex-Plate in the outer shell of the saddle pad is designed with that in mind. It helps to spread the weight of the saddle and rider over the horses back. This eliminates pinching, pressure points, soreness and fatigue. The added benefit of the design is it allows the horse to achieve greater range of motion due to orthotic attributes of the pad.
The pad has other great features including ventilation down the spine, cut outs under the rider’s leg to prevent bunching, and a replaceable wool liner. The liner comes in two thicknesses, ½ and ¾ inch thicknesses. It is also reversible and washable. After 5 years of use my pad is still in great shape. I feel the investment I made in this product was well worth it. Having a horse that is comfortable when being ridden goes a long way to helping you achieve your riding goals.https://www.csisaddlepads.com/
Nose-It Equine Ball
This is the best toy I have seen for a food driven horse. I like to say my horse is the Labrador Retriever of horses because he just loves to eat. When my horse had to be on stall rest and loose weight I began my search for a toy to keep him happy. I found the Nose – It online and after watching the video of a draft horses using it, I ordered it. I started by putting treats in it to see how he would like it. In just a few minutes he had it empty. Next, I broke up hay cubes and loaded the thing. Soon I had to put the hay cubes in as large as possible.
When I took my horse on a three-month trip across the U.S., the Nose – It went with us. The toy was the constant in his stall, which went a long way to decreasing environmental stress.
The durability of this toy was what attracted me. There are no seams in the construction to break when a horse steps on it or kicks it around. The 12-sided shape adds to the challenge of using the toy. I have two of these toys that are 4 and 5 years old. Both of them are in good shape.
My horse started getting skin fungus due to some environmental changes made to the barn he was boarded at. For two years I battled the problem with all kinds of antifungal treatments available for horses and people. They helped but I felt like it was a loosing battle. A friend of mine is a sales person for the Poofy Organic brand of products. When she hosted an online sale to benefit a Labrador Retriever Rescue in my area I ordered the Ta – Ta Dandruff Treatment Shampoo. I figured it was worth a try and even if it didn’t help my horse the money was going to a good cause. I spot treated his break outs and with a week or so the areas began to heal. But what was even better was he had fewer break out the entire time I was using the shampoo. Ultimately the solution was changing to a barn with more turn out time and better ventilation practices.
Here is the Product information:
Great for the relief of symptoms associated with Dandruff, Cradle Cap & general sensitive scalp issues! Chemical Free Treatment!
Ingredients: Purified Water, Deacyl Polyglucans (corn), Organic Vegetable Glycerin (coconut), Organic Apple Cider Vinegar, Organic Avocado Oil, Organic Neem Oil, Organic Essential Oils of Peppermint (Mentha pipe Rita), Patchouli (Progesterone Cabling), Tea Tree (Melaleuca Alternifolia), Roman Chamomile (Anthemic Nobilis) & Ylang Ylang (Cananga odorata), Xanthan Gum (non-gmo corn).
Neem Oil: Neem oil is extracted from a tree bark and works wonders as a fungicide and insecticide. If you have head lice you might want to use this oil. Studies also show its potential to treat Scalp Psoriasis and Seborrheic Dermatitis without the side effects. Helps reduce scalp inflammation and itching too.
Tea Tree Oil: Extracted from the leaves of the tea tree and have a long used by the indigenous people of Australia for its cleansing and purifying properties. Great for treating dry scalp, mild dandruff, head lice and regulating the sebaceous glands.
Peppermint Essential Oil: This refreshing essential oil provides cooling and antiseptic effects to your body. It helps reduce redness, itchiness and irritation. Great for itchy dandruff problems and cooling the scalp’s inflammation.
Chamomile Essential Oil: Chamomile is a mild soothing oil that is popular in a lot of herbal preparations and general tea consumption. It has antiseptic effects and can calm rashes, dry and irritated skin. It’s really good for reducing the symptoms of eczema, psoriasis and other dandruff problems. It also aids in skin regeneration too.
Patchouli Essential Oil: One of the best skin care essential oil available. Patchouli helps break down cellulite and stimulate cell regeneration. It also speeds wounds recovery and reduce visible scarring. Great for removing dandruff and control oil production.
Ylang Ylang- A fragrant oil that has good calming effects on the mind and soul. Helps to balance skin regeneration and stabilize sebum production. The herb is also said to be able to assist in hair growth.
I was given the Vintage Classic Equestrian Watch by the Horsely company to review. First let me say that this companies tag line is “It’s not a Hobby It’s a lifestyle” really does ring true for the kinds of products they offer for sale. I do think the watch is a fun piece to add to your causal wardrobe. It is not suited to everyday wear at the barn since it isn’t waterproof. The face of the watch is large and the stylized horse head is a definite statement piece. The price is reasonable for the quality of the watch. It is a nice gift to give your horse loving friend for a birthday or holiday. Just leave plenty of time for shipping.
Here is the Product information:
This Vintage classic equestrian watch is sure to compliment your horse love. Available in multiple colors, a must have accessory for your smart casual wardrobe.
Sean Johnson Professional Reining Horse Trainer, Glenpool, OK
This post will concentrate on exercises for rollbacks, turnarounds and the counter canter on a finished reining horse.
This was my second trip to ride with Sean Johnson. After losing my trainer at home, I contacted Sean to see if it would be possible to come back to Oklahoma to ride with him a few times a year. Sean put me on a nice gelding named Cluck Cluck Lena. He is so much like my horse Irish I was able to concentrate on improving my riding without having to deal with the big learning curve that comes with riding a different horse. While I was there we worked on all the reining maneuvers. I have outlined some of the main exercise we focused on below.
Rollback Exercise
I like to call this exercise the mental gymnastics exercise. This exercise is designed to help load the outside hock in preparation for the rollback and lead departure in the opposite direction. To do this exercise for the left rollback, start backing in a circle to the right. Pick up your left hand and keep right hand slightly lower. The hand position is the same as when asking for the rollback. Your left leg should be on the cinch and your right leg is behind. As you are backing up look slightly over to the left. Once the horse starts to soften in the backing up, start to lower your hand and keep backing up. Than ask for the rollback by bringing your hand to your left shoulder and turning your head and shoulders in the direction you want to lope off. To do a right rollback reverse the backup direction and the hand and leg position. The way I think of the leg position is to place them where they would be if I was doing a simple rollback but adding in backing circle as a windup before the release. These videos will demonstrate how to do the exercise.https://youtu.be/nxqXJcQKkXU
A few other thoughts about the rollback.
In practice it is good to ask for the lope off a step or two past your line. This helps teach your horse not to anticipate loping off down the line since they are not conditioned to only rolling back a set spot every time.
Think of the rollback as a quick movement, that needs the rider to move slowly to achieve a smooth maneuver.
Turnaround Exercise
The purpose of this exercise is to get the rear inside pivot foot to drive deeper under the horses’ body. Start by trotting a circle. Pick your outside hand up and place it on the horses’ neck and keep your inside hand down and out. Using your inside leg, push the inside hip toward the outside of the circle. Keep your outside leg up near the cinch. Once you feel the horse is crossing over/under well, then stop and ask them to turn in the direction you were trotting. If you were trotting right then turn right. The tendency is for the horse to start moving their front end faster. To block this from happening you can pick your outside hand up and tip the horses’ face to the outside of the circle. Check out these videos to see how the exercise is done. https://youtu.be/05BWL50GT9M https://youtu.be/05BWL50GT9M
Counter Canter Exercise
This exercise helps you use your legs and seat to feel when your horse starts to push or lean on you. Start by looping in the counter canter around the length of the arena. As you go down the long side of the arena start to lengthen the horse’s stride. About 3 – 4 strides before the corner slow down, then make a 90 degree turn and stay parallel to the short side of the square and make another 90 degrees turn, once you are pointing straight, drive down the long side. During these turns the horse will have a tendency to drop to the inside. You will need to use your inside leg to keep the horse stood up. This exercise also helps develop your ability to rate the horses’ speed. This will also help you use your body position to maintain a straight line, which is needed when doing a sliding stop. This video explains the exercise.
I was fortunate to be able to spend eight days riding with Sean. The ability to repeat the exercise multiple days in a row makes it easier to learn the feel of the horse’s movement. Now that I have the feel, I can take the information home and practice on my own horse.
After working at home for a few days Irish and I really started to click with these exercises. I am looking forward to some even snappier rollbacks and smoother turnarounds.
While riding with Sean Johnson I logged 20 hours toward the AQHA Horseback Riding Program. I also earned my 2000 hours reward gift. A Professional Choice Saddle Pad Case. Go to the AQHA website to find out more about the Horseback Riding Program and AQHA. https://www.aqha.com/trail-riding/programs/aqha-horseback-riding-program
For more information about Sean Johnson Professional Reining Horse Trainer go to: http://johnsonreining.com/
I hope you have enjoyed this post and will share it with your friends.
While visiting the Tulsa, Oklahoma area I was able to enjoy many of the cultural and historical attractions. Including: Philbrook Museum of Art, Tulsa Zoo, Oklahoma Aquarium, Heart of Route 66 Museum, and the Sapulpa Historical Museum.
Philbrook Museum of Art
Philbrook Museum
Philbrook Museum Formal Garden
The Philbrook Museum of Art is located in Tulsa, Ok opened to the public on October 25, 1939. . The historic 1920’s villa of Waite and Genevieve Phillips and its surrounding 25 acres of gardens are the perfect back drop to showcase the museum’s collections. Located in downtown Tulsa, OK there is a branch of the Philbrook Museum of Art which can be visited on the same day for one admission.
The Italian Renaissance villa is a work of art in and of itself. The main rooms of the house feature travertine and marble fireplaces, a double staircase with stained glass windows, ornate vaulted ceilings painted with Italian Renaissance designs and large windows looking out to the formal gardens.
Philbrook Great Hall Stairs
Philbrook Fireplace surround
Stainglass Window Philbrook Museum
Philbrook Great Hall Fireplace
The permanent collection includes European, American, Native American, Modern African, Asian pieces as well as antiquities.
Clock set 19th century French
Carved Wood Chest
Wedgewood Blue Jasper Ware 1860
Japanese Sengoku of Edo Period Armor ca 1543
Buckskin Covered Cradleboard 1943
Miniature Plaque Horse Hair 1995
In the Glory of God Coiled Clay
by Richard Zane Smith 1995
Porcelain Texas Seed Pod
by Janet A. Frankovic 1959
Sandblasted and Blown Glass
by Dick Huss 1946
Perfume Bottle with Stopper
Laminated Glass and Granite
by William Carlson 1990
Armor with Horse Armor
Armor
There are formal and informal gardens that invite you to enjoy a relaxing stroll. Throughout the gardens there are sculptures and plantings that draw you through to keep discovering the beauty that is just around the bend.
Indian Statue
Hippo Welded Steel Bumper
by John Kearney 1973
Dogwood Trees Philbrook Gardens
The Philbrook Museum offers a varied collection of art in an architecturally interesting building that will please the serious art lover and the casual visitor. I personally enjoyed the building, gardens, sculptures and antiquities the most. http://philbrook.org/
Tulsa Zoo
Statue of Tigers at the Tulsa Zoo
The Tulsa Zoo focus has been on, family friendly recreation, natural sciences education and supporting the conservation of wildlife for the last 90 years. The zoo is located in Mohawk Park owned by the city of Tulsa and is one of the largest city parks in the United States.
Jaguar
Malayan Tiger
The exhibits in the zoo are more than just the animals. They are the habitat and the kinds of animals that live there. Many of the exhibits contain multiple animals living together just as they would in the wild. In addition to that there are daily keeper talks about the animals that server to engage and educate the visitors. Truly, the animals are the main reason to visit the zoo so here are a few of the amazing and majestic animals that make the Tulsa Zoo home. https://tulsazoo.org
Scarlet Ibis
Southern Screamer
Spectacled Owl
Snowy Owl
African Penguin
Flamingo
San Esteban Chuckwalla
Komodo Dragon
Mexican Beaded Lizard
Chinese Alligator
Arctic Fox
Kanagaroo
Oklahoma Aquarium
Lionfish
Is located on the banks of the Arkansas River in Jenks, OK. The Aquarium finally opened to the public on May 28, 2003 after 19 years of work to build support to bring Dr. P.R. Ramey and Doug Kemper idea to life. There are exhibits that focus on invertebrates, Oklahoma species, Ozark habitats, coral reefs, and sharks. Having an undergraduate degree in zoology with a focus on ocean invertebrates and their habits made a visit to the Oklahoma Aquarium like having a flash back to my college days when I studied on the coral reefs and the intertidal zones of the Atlantic Ocean. The mix of local species and ocean habit made the Oklahoma Aquarium a great spot to visit. https://www.okaquarium.org/
Pacific Sean Nettle
White Spotted Jellyfish
Porcupine Pufferfish
Stone Fish
Albino Red Ear Slider Turtle
Water Dog
Banggai Cardinalfish
Pot-Bellied Seahorse
Red Spined Star
Leather Star
Horse Conch
Bahama Star Underside
Longnose Gar
Paddlefish
Long-horn Cowfish
Green Moray
Heart of Route 66 Museum
Heart of the route 66 Auto Museum Sign
Heart of Route 66 Museum was born on August of 2016 when a group of “car guys” combine with a Sapulpa, OK, located on the “Mother Road” known as Route 66 to create a car museum. In 2012 Richard Holmes and a group of car enthusiasts started the Tulsa Auto Museum Group, with the purpose of finding a location in Tulsa County for an antique car museum. After four years of searching they almost gave up on the dream when, Tim Dye, curator of the Pontiac Museum in Pontiac, IL called Richard Holmes telling him about the city of Sapulpa, OK old decommissioned armor. After looking at the space they determined it was what they were looking for and they changed their name to Heart of Route 66 Auto Museum.
1958 BMW Isetta
1958 BMW Isetta
1967 Amphicar
1959 Maserati
Currently the museum has a rotating antique car collection. This is due to private collectors allowing their cars to be on display. They also have an exhibit that pays homage to Route 66 and what it meant in the past and what it means today. Before you even enter the museum the 66-foot-tall gas pump sits out in front, just asking you to stop and enjoy the all the amazing antique cars that are on display. https://www.heartofroute66.org/
1959 C75 Silver Pigeon Motor Scooter
1953 Harley-Davidson Model 165
1905 Cadillac
1922 Packard
1924 Austin Chumnny Tourer Model 7
1932 Cadillac V 12
1934 Ford
1940 Packard
1947 MG
1957 Ford Retractable
1957 Chevy
1967 1 1/2 Jaguar
1965 Chevy Impala
1967 Chevrolet Camaro SS Convertible
1969 Ford Talladega
2006 Dodge Hemisfear, Chip Foose
Sapulpa Historical Museum
In 1968 a group of people wanted to preserve the history of the city that was once called “Crossroads of America”. It was given that distinction because the Highway 66 running east – west and Highway 75 running north – south intersected in Sapulpa, OK. Even before the highways were built, Sapulpa already had a firm place in U.S. history. Sapulpa history started with the Louisiana Purchase Treaty, dated April 30, 1803. But the Indian Removal Act of 1830 followed by the relocation Native American tribes to the area in 1836 and 1837 brought with it an influx of people and traders. The city got its name from on Creek tribesman named Sapulpa.
In the early 1880s, the Atlantic & Pacific Railroad built a spur from Tulsa to the area to transport walnut logs to Eastern markets. Sapulpa befriended the railroad workers, and they began calling this village “Sapulpa Station.” In 1898 Sapulpa was chartered as a town.
Model Train Turn Around
Today the museum honors the history of the area and its people with interesting displays that depict life in Sapulpa, OK from the early days as a territory to present day. They do offer guided tours of the museum which is always a great way to learn about the exhibit and local area. http://www.sapulpahistoricalsociety.com/
1920 -1930 Kitchen Display
1890 Kitchen Display
Sapulpa Historical Society
General Mercantile Display
Sapulpa Historical Society
Livery & Feed Stable display
Maytag Washer Machine
Kenmore Washer Machine
Sapulpa Fire House #1
Fire Truck used 1939 -1960
I hope you enjoyed learning about Tulsa, OK and the surrounding cities. Be sure to share this post with all your friends on Facebook and Instagram.
This site uses functional cookies and external scripts to improve your experience.
Loading Comments...
Privacy settings
Privacy Settings
This site uses functional cookies and external scripts to improve your experience. Which cookies and scripts are used and how they impact your visit is specified on the left. You may change your settings at any time. Your choices will not impact your visit.
NOTE: These settings will only apply to the browser and device you are currently using.
Google Analytics
Your personal information is used to provide products and services. We use Goodle Analytics to improve the functionality of the website. Mail Chip to send out updates from HorseTail Legacy LLC, Stripe to provided online sales payments.


 Our horses are trained to be responsive to our body ques. When you ride a circle, you want to ride spotting 1/8 of the circle at a time. If you ride too far ahead of your horse it becomes difficult to maintain a consistent circle. An older horse knows how to stay under your hands and follow the circle however, if they make the back decision to lean in or out of the circle Bobby likes to correct this by turning the horse sharply across the circle and then get back on the circles’ path. These two techniques helped my circles a great deal. It also helps reduce the need to continually pick up my hands to guild him to do what he already knows my horse throughout my circle. The more we did this the better he stayed between my hands and on the path of the circle.
 When transitioning from fast to slow circles you need to build in the cues that signal the horse to make the change in speed. Start by loping a circle and when you want to slow down start to hum, pick up your hand as they start to come back to you drop your hand. Use your outside leg to push the hip into the circle. Then once they come back, you want to stop them. This conditions the horse that when they hear the hum they think stop. Once they understand the cues, then move on to the transitioning from fast to slow circles. Be consistent and your horse will learn how to transition smoothly.


 I bought my CSI saddle pad in 2013 at “The Road to The Horse” event in Lexington, KY . I was looking for a quality pad for my aging American Quarter Horse Legacy. I stopped by the CSI booth and really liked the design concept of the pad as well as the quality materials that are used to make the pad.
 I was given the Vintage Classic Equestrian Watch by the Horsely company to review. First let me say that this companies tag line is “It’s not a Hobby It’s a lifestyle” really does ring true for the kinds of products they offer for sale. I do think the watch is a fun piece to add to your causal wardrobe. It is not suited to everyday wear at the barn since it isn’t waterproof. The face of the watch is large and the stylized horse head is a definite statement piece. The price is reasonable for the quality of the watch. It is a nice gift to give your horse loving friend for a birthday or holiday. Just leave plenty of time for shipping.